This is the fourth part of the Compose dribbble replicating series. Check out the previous articles if you haven’t seen them yet Part 1 - Waveform animation, Part 2 - Action Panel, Part 3 - Collapsing Header. In this part we will discuss transtions between app views.
Shared Element Transition
In the old AndroidView we could use shared element transition as part of the Transition Framework. But in Compose there is no standard solution. In general, it’s not so hard to write them yourself - let’s describe what we need to do with shared element:
- Animate screen position.
- Animate size.
- Animare corner size.
So, we need to know all these parameters in initial and target states. Let’s start with writing a data class:
Initial corner radius we can set as
Initial Offset and initialSize we can get by using .onGloballyPositioned.
Combining everything, we get this:
Now we need to find out the target parameters for the end position.
![]()
targetOffset. To find the x offset of an element that will be centered, we need to subtract the width of the element from the screen width and divide by two. We set the vertical offset ourselves:targetSizewe set ourselves as well.targetCornerRadiuswe set as half of the shared element size. And since our element is round:targetCornerRadius = sharedElementTargetSize / 2
The basic idea is that at the moment of transition, in the new function we place the shared element in the state it was in in the previous composable function, and then animate it to the state it should be in.
We can use LaunchedEffect to start the progress animation.
Since we need to animate several things, we can animate only offsetProgress (the animation we showed above), and use linear interpolation to show changes to other parameters:
This is how you can use sharedElement:
And this is all you need to animate the shared element transition! Let’s now look at the drag gesture transition.
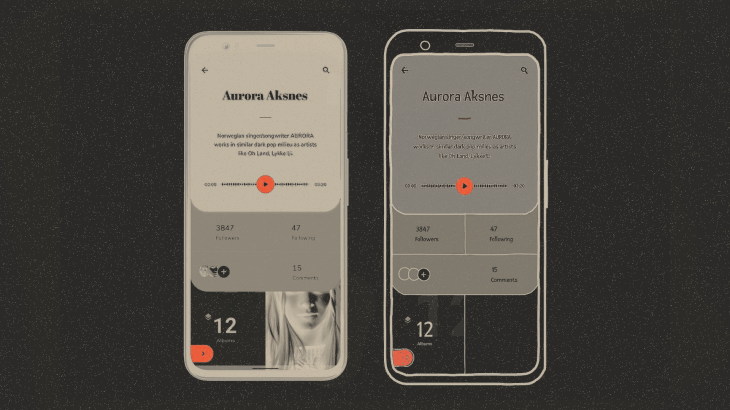
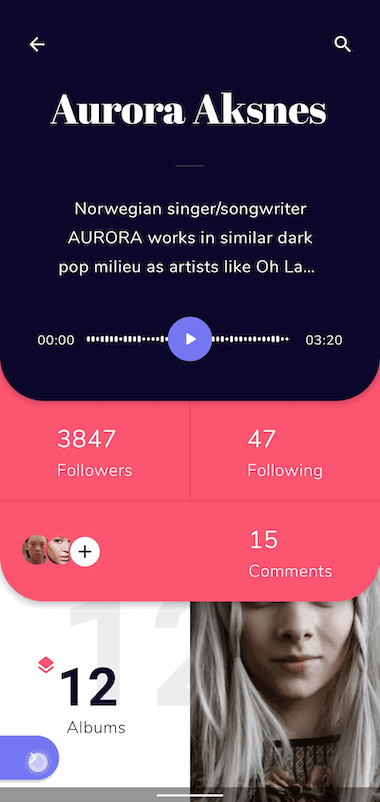
Drag gesture transition
In our design we have a draggable button, which can be used to go to the next screen either by tapping or by swiping to the right.
For tapping, we use:
For drag gestures we can use:
onDragStart is used to change screen state, to start drawing the new screen that appears.
onDragEnd is used to see which way the animation will end up. If the user completed the gesture and lifted their finger to the middle of the screen, the screen would return to its previous position. When the user's gesture ends after the middle of the screen, we finish the animation and move to a new screen.
We use this method to determine which action to perform when the gesture is over.
onOffsetChange method is used to set the new offset and calculate the transition progress for animations.
Progress for the other animations we calculate from 0 to 1.
Based on this progress, we animate the necessary elements. A song information panel that moves up, a comment panel that moves out to the left, an album image that zooms in, an album list that appears.
For example, we calculate playerControlOffset using CubicBezierEasing for a nonlinear offset change:
This concludes the transitions between app views. The 5th and last installment will cover finding and fixing performance issues. Release coming soon!