This is the second article from the “A Scanning Dream” series. We will discuss the most affordable and universal approach for creating a 3D model of the object or scene. It is called “photogrammetry” and uses a series of photos made by an ordinary camera. Photogrammetry is about retrieving form, size, position and other characteristics using photos. The most popular modern photogrammetry technique is “Structure From Motion” which is implemented in most popular software products.
How it works
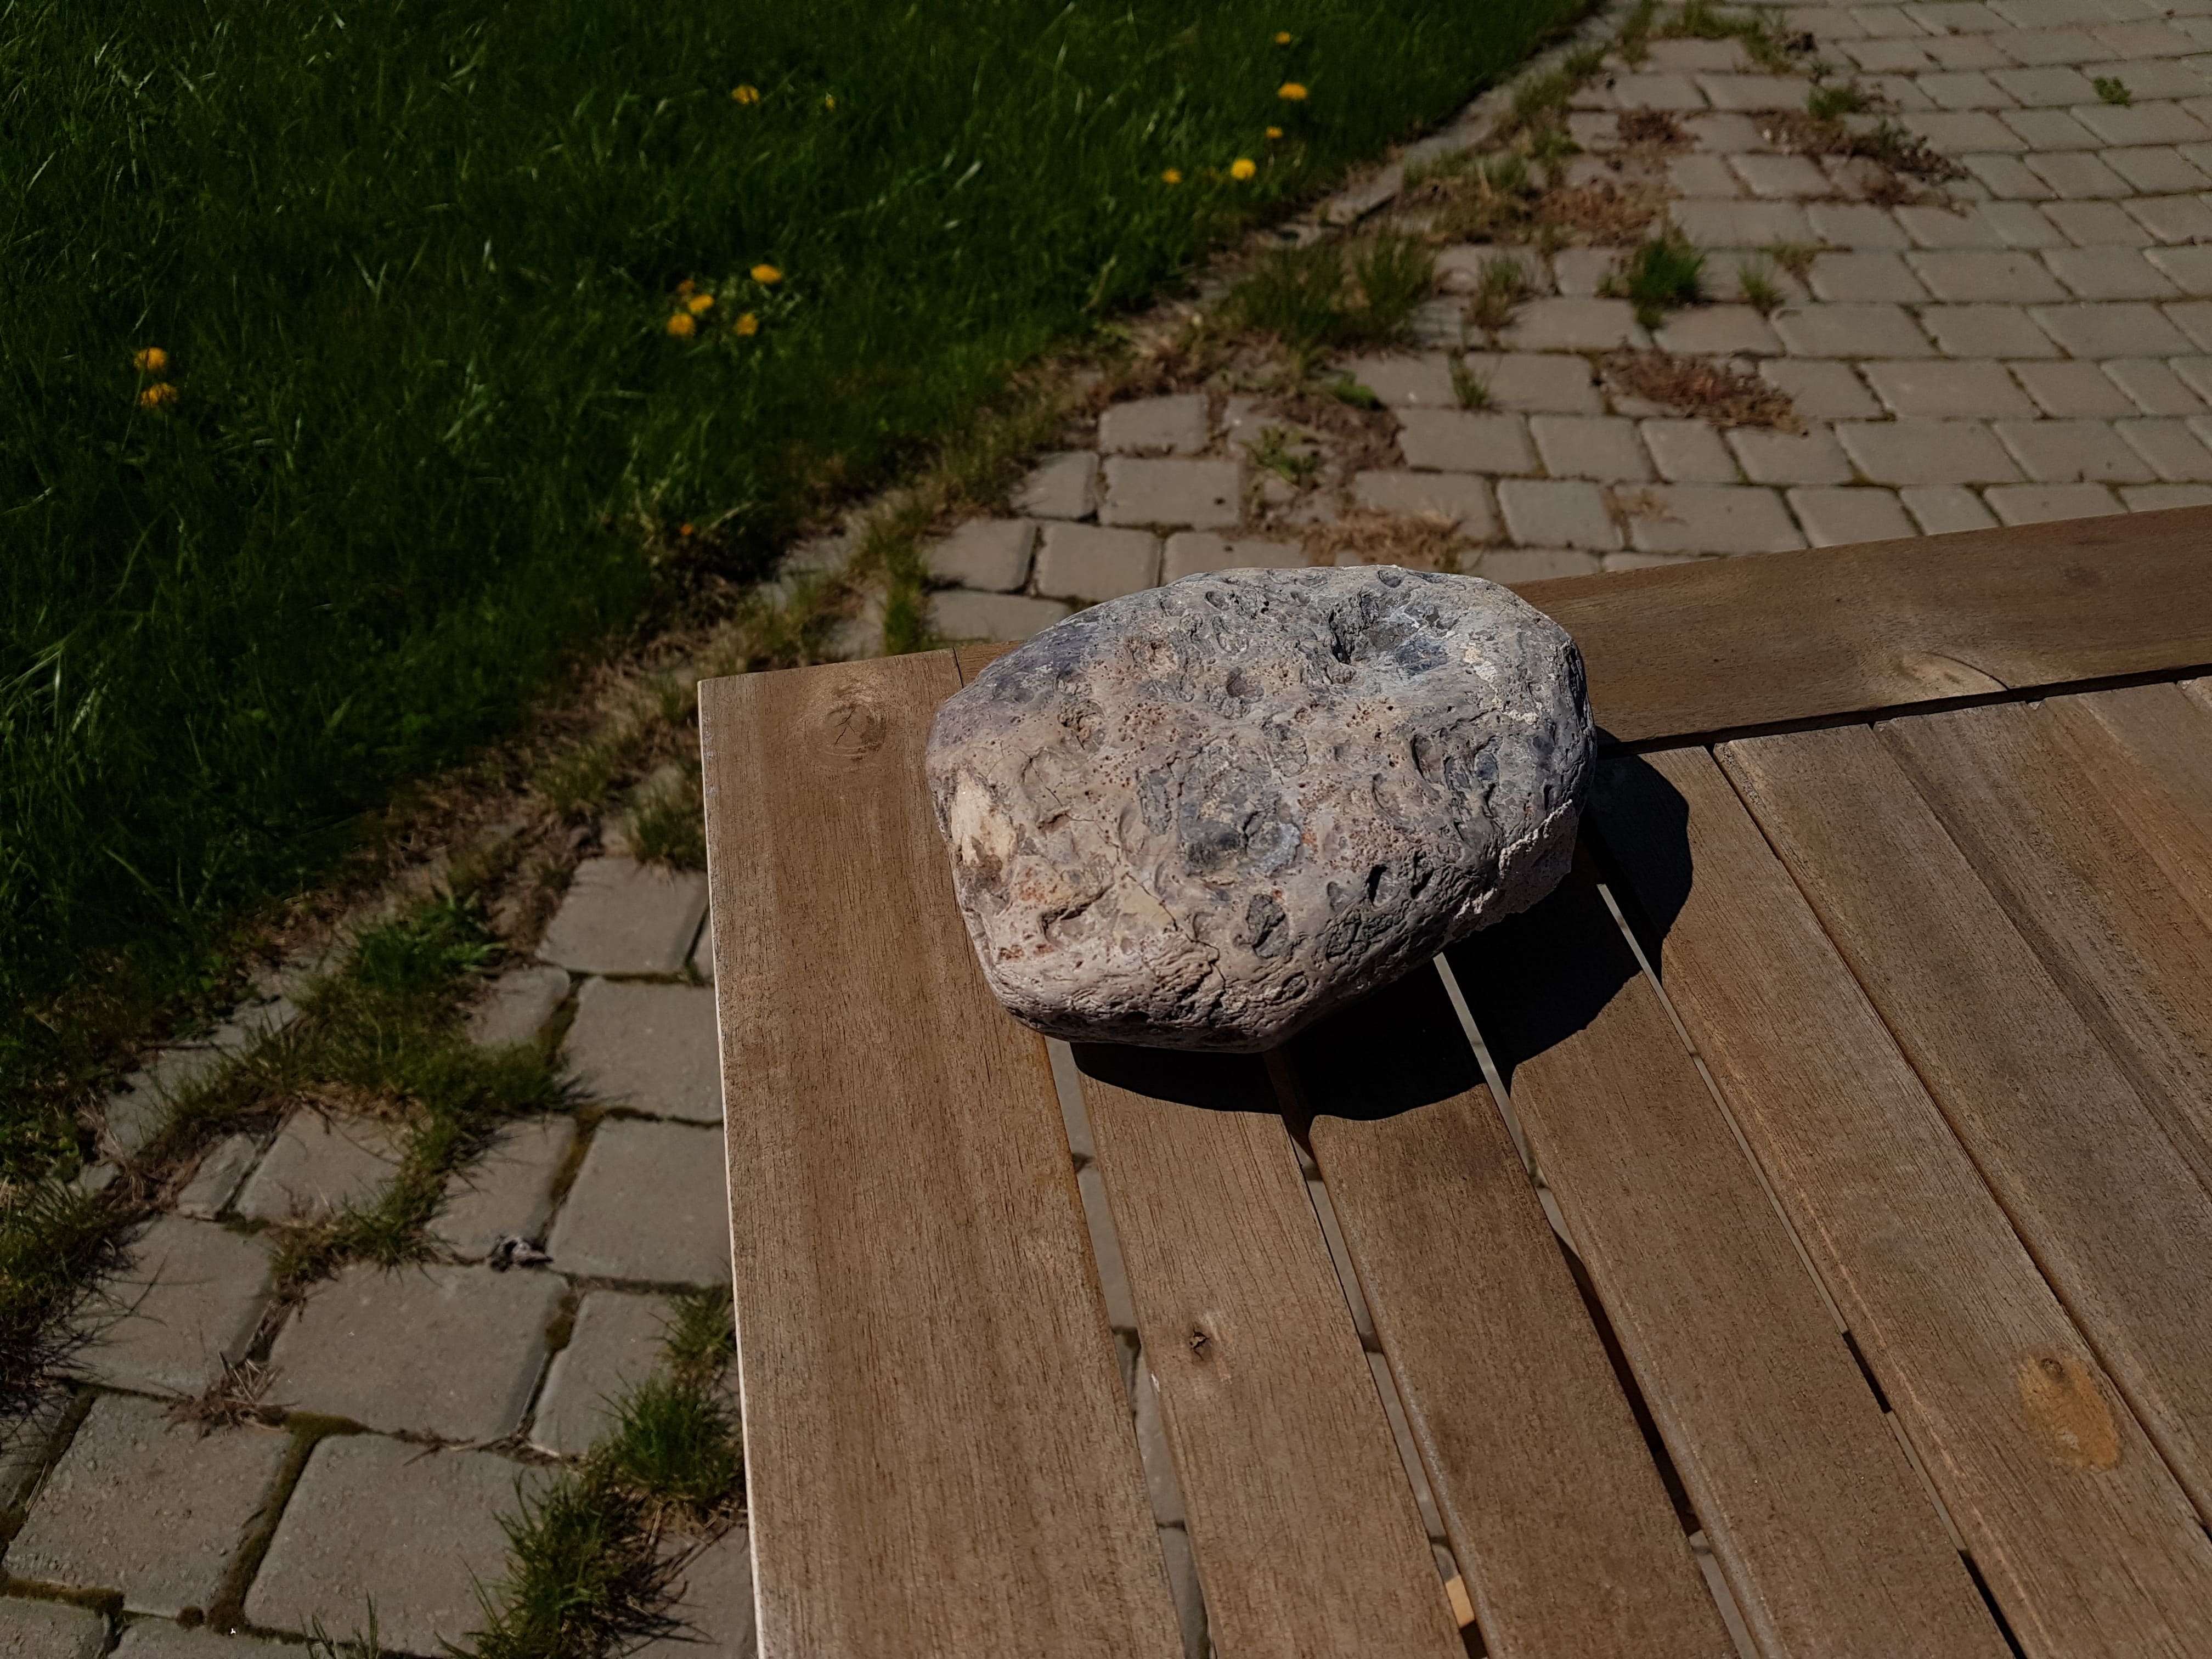
First, the object or scene should be captured as a series of overlapping photos from all angles. There are a bunch of practical tips on how to achieve the best result (for example here, here and here). Shooting good photos for photogrammetry isn’t art - it’s a skill that requires you to know how to use a camera and plan the shooting process.
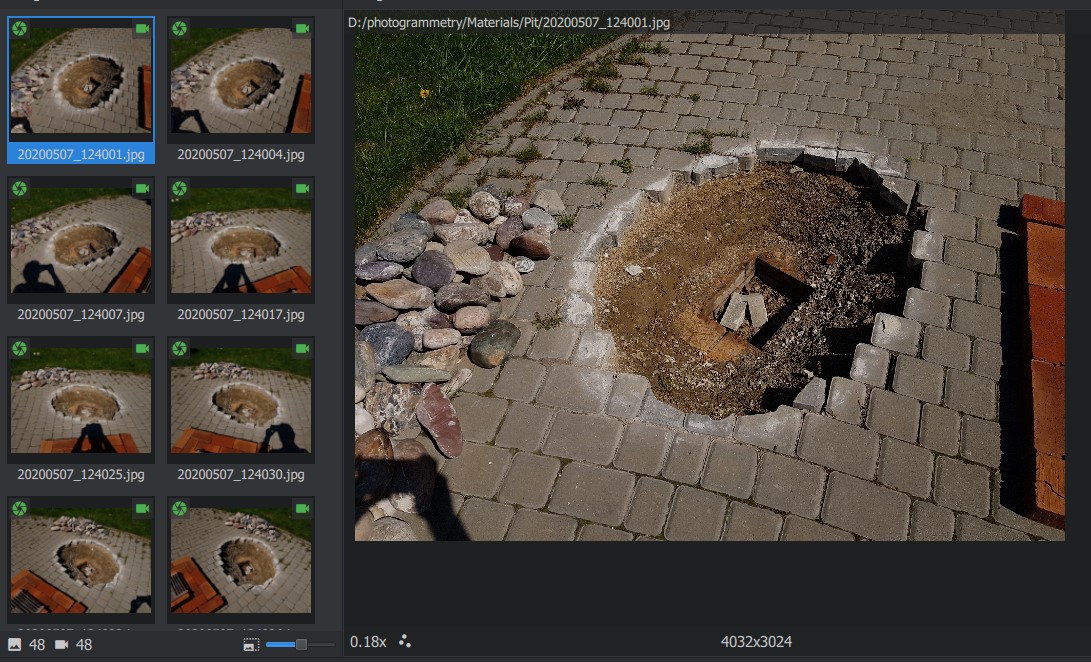
In the next step the software detects features (a distinctive group of pixels) for each photo. There are several methods to get such features (e.g. SIFT, SURF, KAZE, AKAZE, ORB and BRISK). These methods provide features that are invariant to some transformations. For example, the most popular SIFT method provides features which are invariant to rotation and uniform scaling even for noisy photos. A good comparison of these methods can be found in the article A Comparative Analysis of SIFT, SURF, KAZE, AKAZE, ORB, and BRISK.
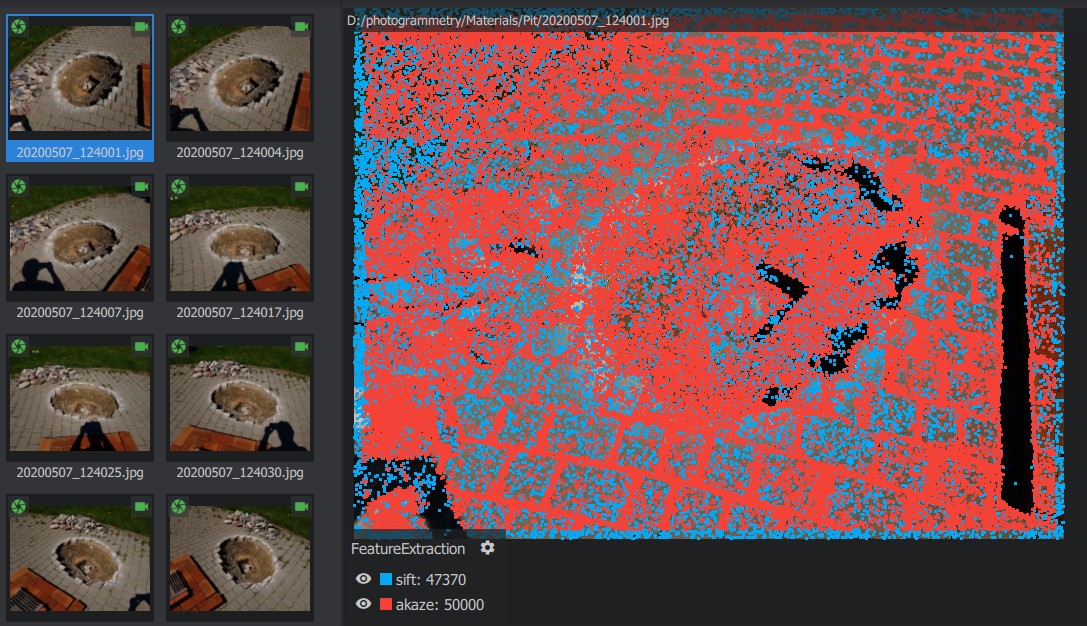
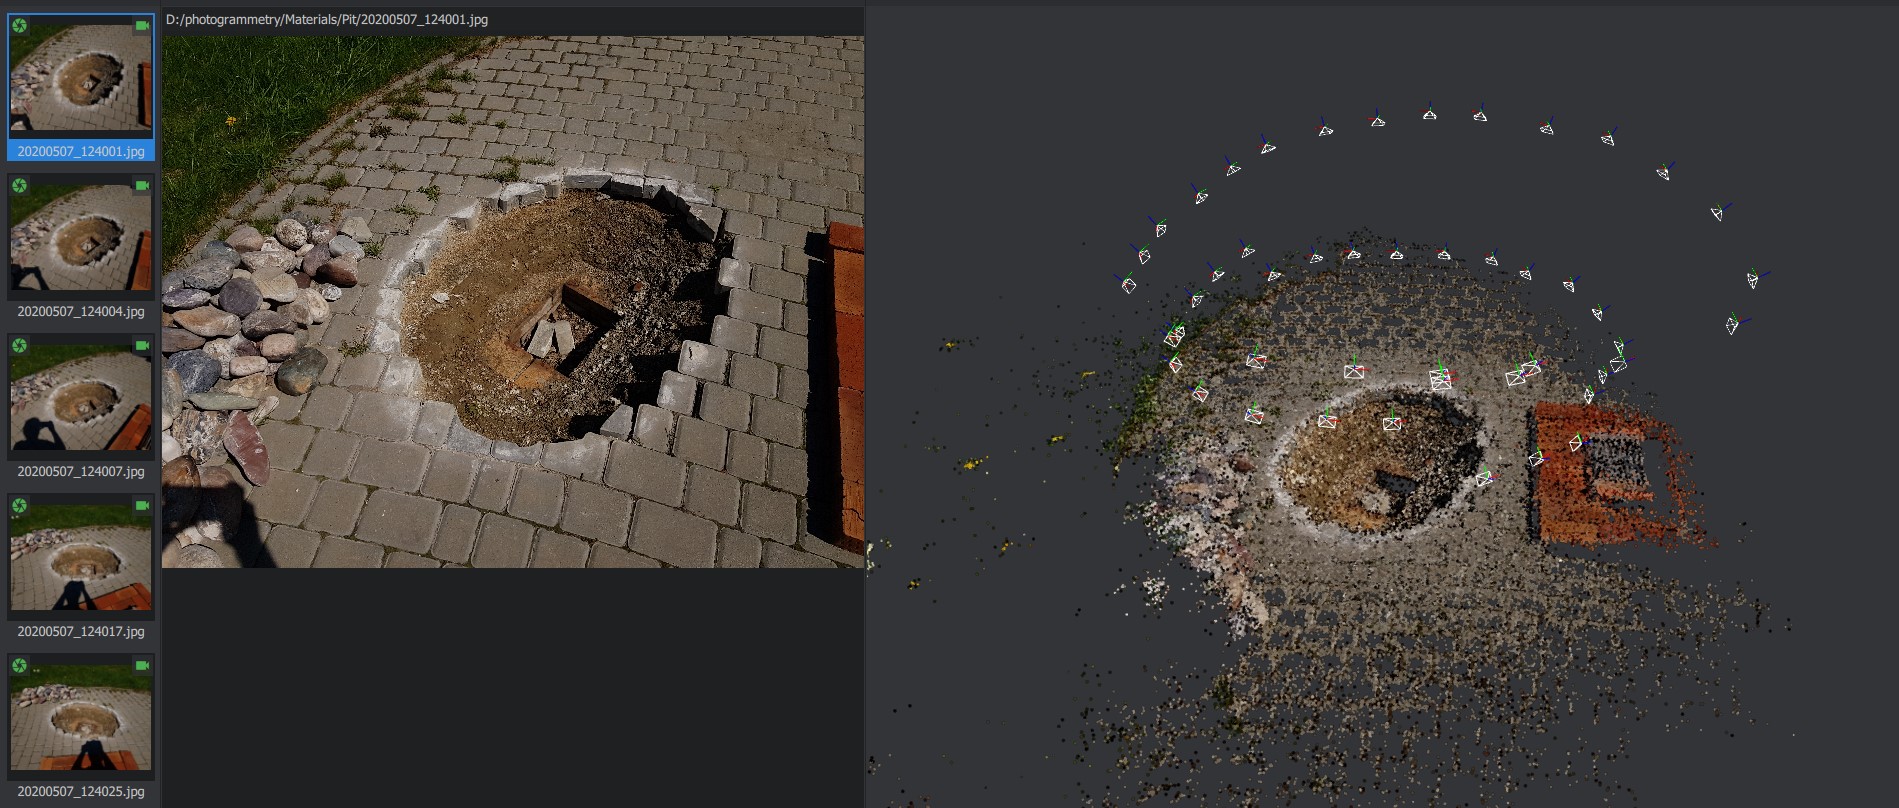
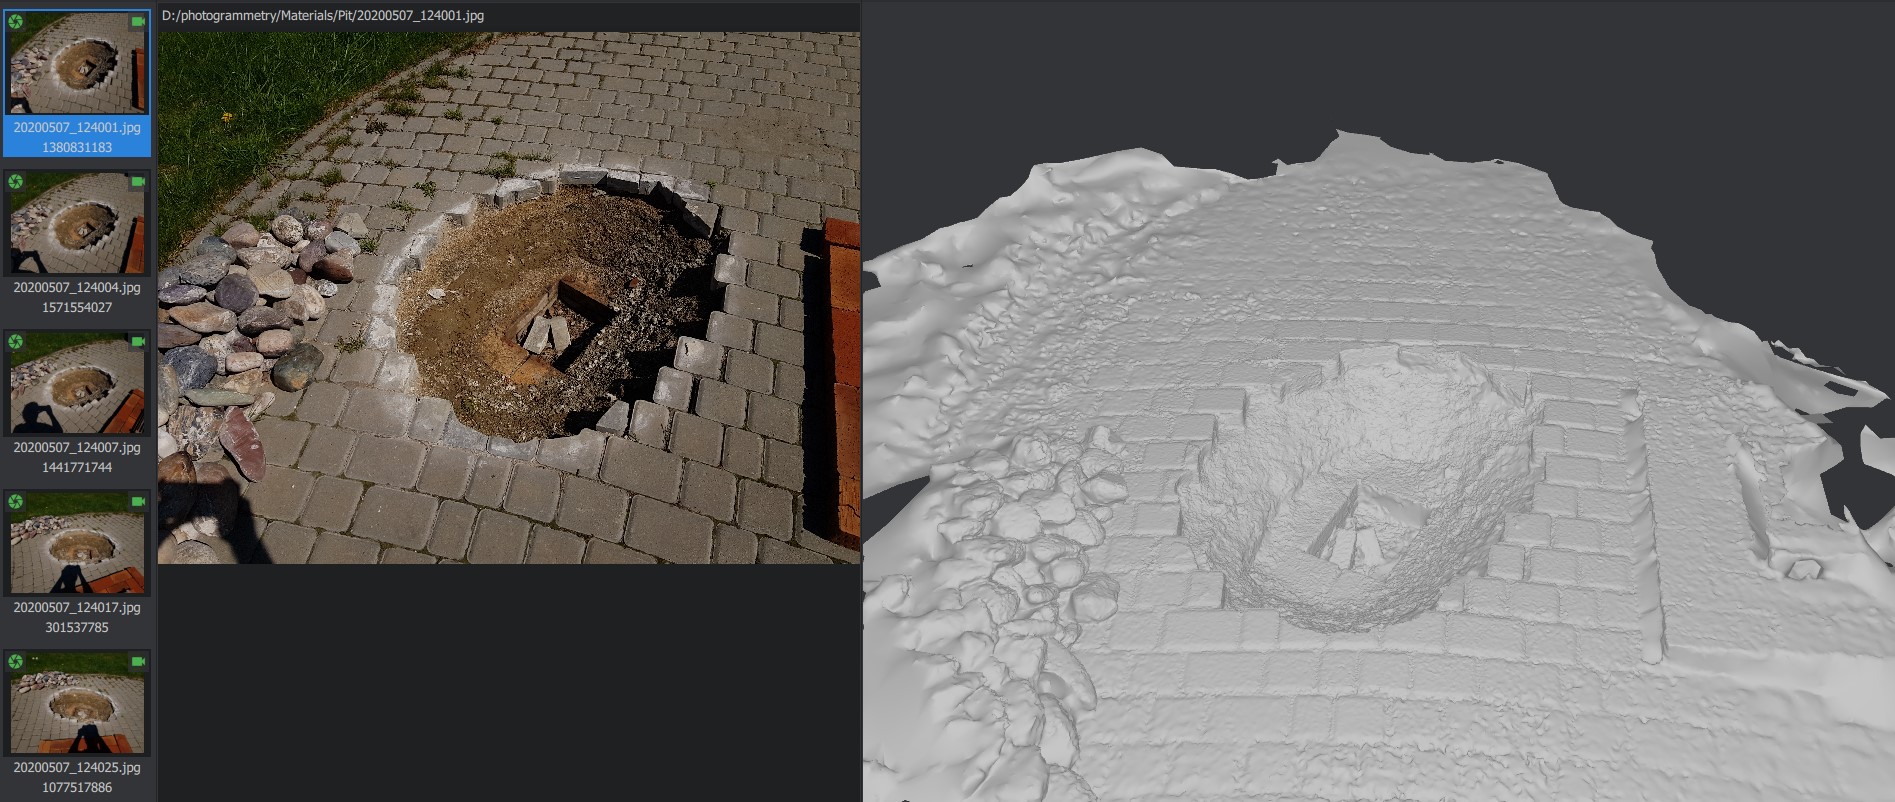
In the next stage the software searches for photos with the same features and matches them with each other. It’s possible even if the camera had a different horizontal angle and distance towards the object because, as mentioned before, these features are invariant to rotation and uniform scaling. Next, an iterative algorithm calculates the position and rotation of the camera for each photo using the 2D position of the matched features. Then the software calculates the 3D position for each feature - this way you get the 3D point cloud of features describing the target object or scene.
Then the software builds a depth map - a set of distances from the camera to each pixel for each photo.
The software merges multiple depth maps to build the mesh of the target object or scene.
At the final stage the software builds the textures for the mesh using the average value of the pixels for each triangle of the mesh. It also excludes cameras/photos with a bad angle relative to each triangle of the mesh.
Unfortunately, it’s unlikely you will be able to use the resulting 3D model right after the final stage - it’s definitely not possible for our VR application. For example, the reconstructed model has 2.9M triangles and only provides a diffuse map and a useless UV map (as it significantly bumps up the VRAM usage). The model will have to be processed manually (we will describe this process in the final article of the series).
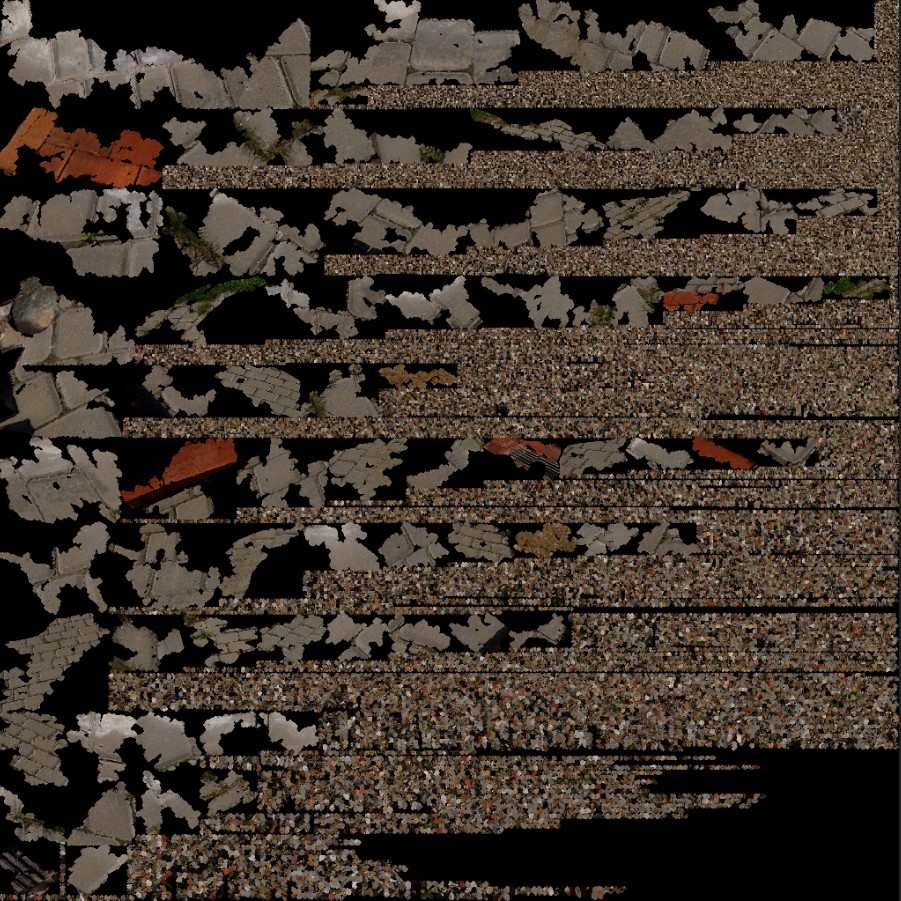
This is an example of the UV map for the model above, showing tons of parts.

What is required
You can use almost any camera for photogrammetry, from the smartphone one to an expensive DSLR or mirrorless camera. But it should meet these requirements:
- Be able to manually set the white balance.
- Be able to manually set focus.
- Have minimal lens distortion.
- Support short exposure in a case of not using a tripod.
The objects shown above were captured using a Samsung S8+, which supports the manual (pro) shooting mode and has a good enough lens. However, even the best smartphone cameras have a much too small physical matrix and lens size so they can’t provide good results without tricky software and hardware image filters. Can these filters compete with professional DSLR and mirrorless cameras in the context of photogrammetry? It depends on your needs, but smartphone cameras are getting better each year - this article (March 2020) compares modern standalone cameras with smartphone ones. Based on our experience, we can’t recommend using a smartphone like Samsung S8+ in case of ISO higher than 50 or for relatively large target object/scene.
Of course, the final quality depends on the camera a lot, but the most important work is done by software. The better known applications provide a good enough result even in an automatic mode, but you are able to tweak them further if you want. We’ve had good experience with an open source platrofrm MeshRoom. Commercial software like RealityCapture provides almost the same quality, but does it significantly faster than MeshRoom. Some commercial software also provides additional tools to post-process the model after the reconstruction.
As any photogrammetric software, MeshRoom requires powerful hardware. It took several hours to create the textured 2.9M triangles mesh on a PC with Core i7 8750H, 32 GB RAM and NVIDIA GeForce RTX 2070 Max-Q.
There are also photogrammetric apps available for Android and iOS that can automatically capture target objects and scenes, simplifying the process a lot. They usually also provide a real-time scene preview on the smartphone screen. The reconstruction itself is completed either on the device or in the cloud. Unfortunately, we weren’t able to get an object with a high enough quality by using these apps, and we doubt that in the near future mobile-based photogrammetric apps can provide 3D models usable for VR applications.
Limitations and Conclusion
There are some limitations to photogrammetry:
- It’s impossible to reconstruct objects with reflective, transparent or plain surfaces.
- The reconstructed object (or the camera if using a rotating table) should not be changed from its original position and shape.
- The lighting should not change during the capture.
- The lens settings should not change during the capture.
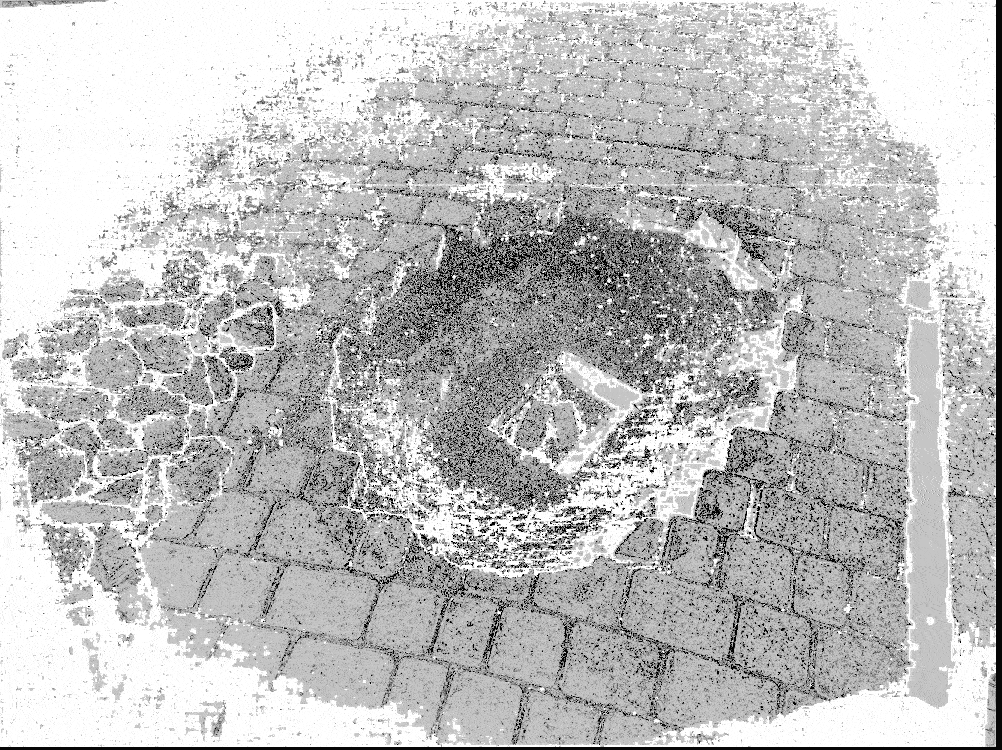
It’s impossible to detect features in objects with reflective, transparent or plain surfaces. It leads to gaps or wrong geometry during the model reconstruction. But you can mitigate this issue by using special matte sprays for photogrammetry.
If the object has been moved, the camera position will be calculated incorrectly. This wrong camera position will lead to a bad reconstructed mesh so the final model will have bad geometry. This issue makes it hard to reconstruct animals and humans (especially kids) using just a series of photos. But it can be improved by using a rig of several cameras shooting at the same time.
Changing light conditions will change the pixel value for the same object region in different photos. It leads to different features for the same object parts and consequent gaps in the reconstructed mesh. It’s also important for the target object or scene not to have shadows - it’s highly likely that places with shadow will be reconstructed as holes in the mesh.
The next article “Scanning Dream: Using Structured Light” will describe structured light systems which partially solve limitations of photogrammetry.