Apple’s apps and widgets always were a staple of design, and inspirations for our Replicating Series: Activity Application and Card application. When they announced the new Apple Watch Ultra, the design of the depth gauge widget caught our eye, and we thought it would be cool to replicate it on Android! As usual for our Android replicating challenges, we used the Jetpack Compose framework.

This article will tell you how we went about implementing it - creating a wave effect, having the water snap around the text, and blending colors. We feel like this will be useful both to beginners and those already acquainted with Jetpack Compose.
Water Level
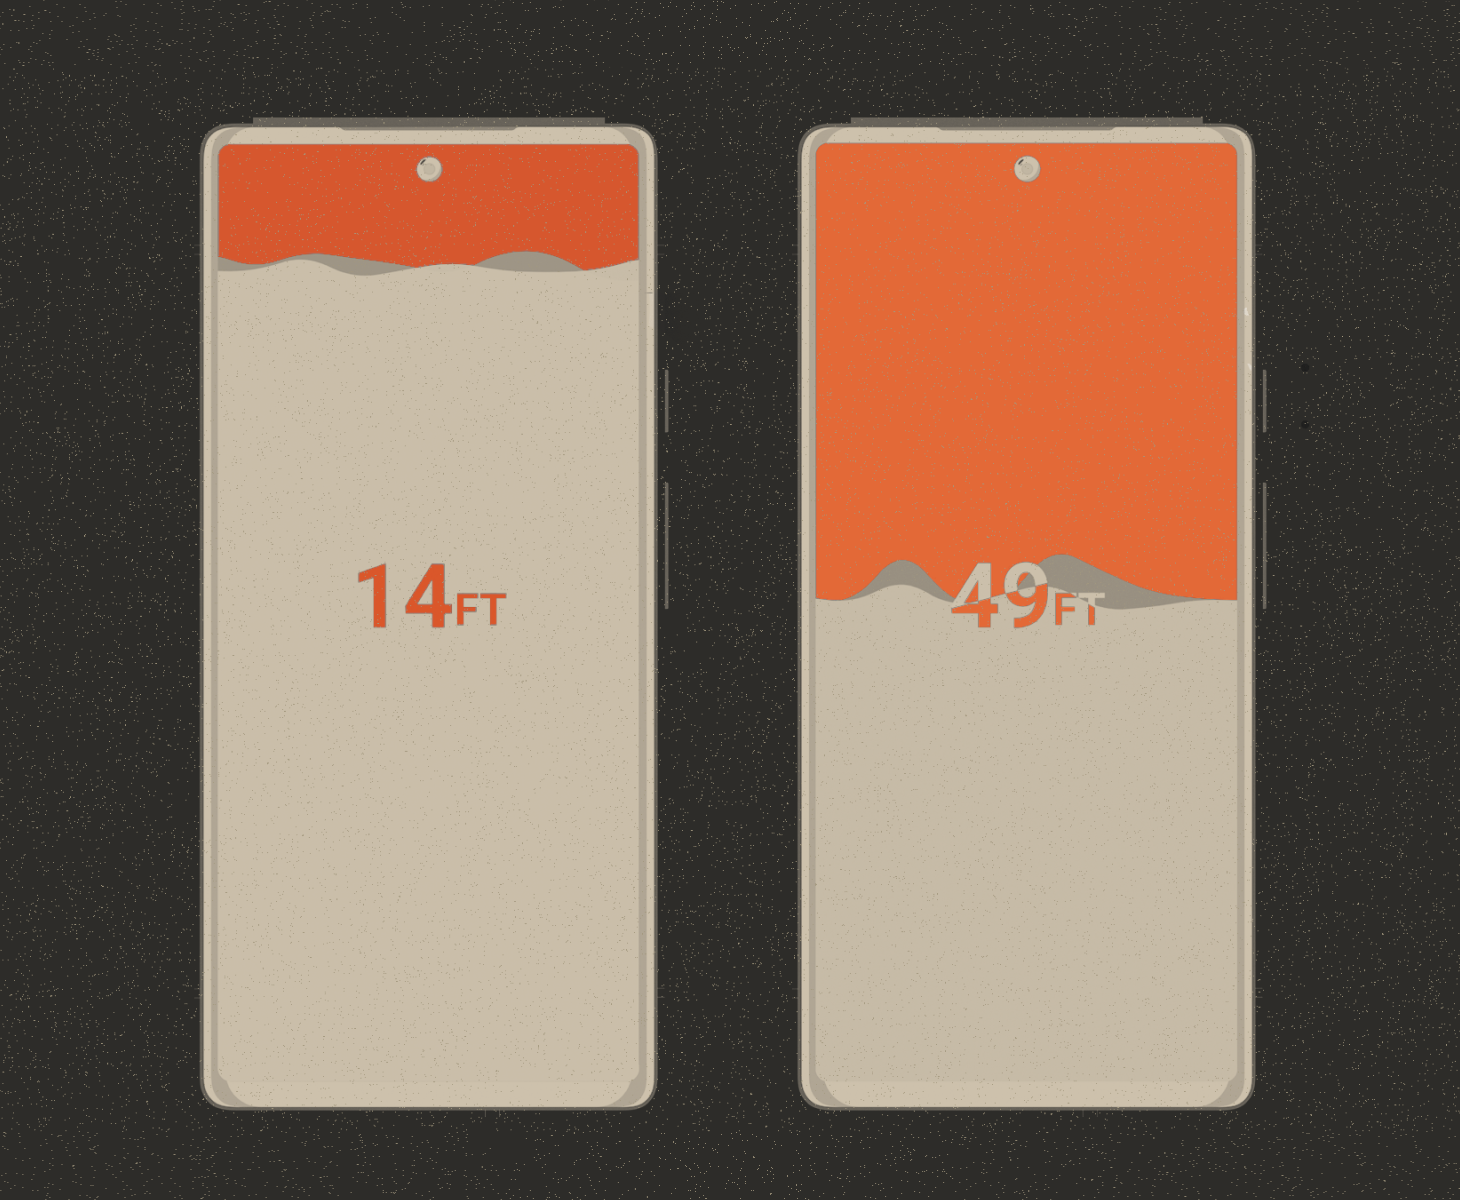
First, let's consider the most trivial problem - how to calculate and animate the water level.

Next, we define the duration of the animation and the initial state:
After that we need to define how the water’s progress should change. It’s necessary for recording the progress on the screen as text and for drawing the water level.
Here’s a closer look at waveProgressAsState. We use animatable because it gives us a little more control and customization. For example, we can specify different animationSpec for different states.
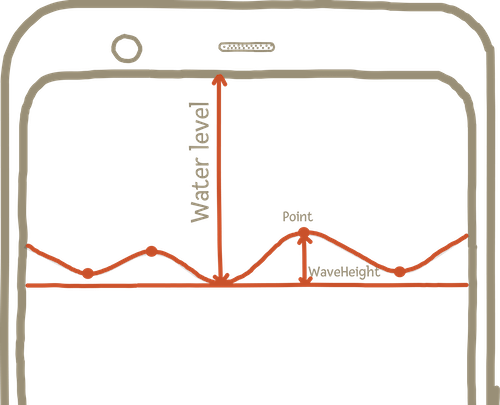
Now to calculate the coordinates of the water's edge that needs to be drawn on the screen:
After all this preliminary work we can move on to creating actual waves.
Waves
The most common way to simulate a wave is to use a sine graph that moves horizontally at a certain speed.
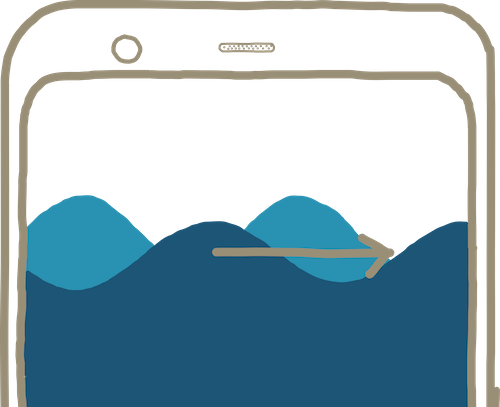
We want it to look more realistic, and it will have to flow over the elements on the screen, so we need a more sophisticated approach. The main idea of the implementation is to define a set of points representing the height of the wave. The values are animated to create the wave effect.
First, we create a list with points to store the values:
Then, in the case of normal water flow when there are no obstacles in its path, we simply fill it with the values of the water level. We will consider the other cases later.
Consider an animation that will change the height of each point. Animating all the points would take a heavy toll on the performance and battery. So, in order to save resources, we will only use a small number of Float animation values:
To prevent the animation from repeating every 15 points and the waves from being identical, we can set the initialMultipliers:
Now to add the waves - iterate through all the points and calculate the new heights.
Adding initialMultipliers to currentSize will reduce the possibility of repeating values. And using linear interpolation will help smoothly change the height:
Now the most interesting part - how to make the water flow around UI elements.
Interactive water movement
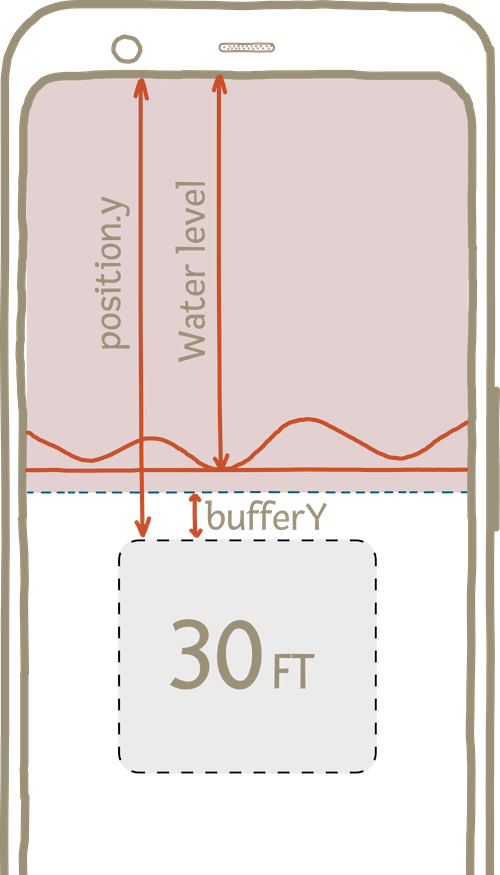
We start by defining 3 states that water has when its level decreases. The PlainMoving name speaks for itself, WaveIsComing is for the moment when the water comes up to the UX element the water will flow around and you have to show it. FlowsAround is the actual moment of flowing around a UI element.
We understand that the water level is higher than the item if the water level is less than the item position minus the buffer. This area is shown in red on the below picture.
When the water level is at the level of the element, it is too early to start flowing around yet. This area is shown in grey in the next picture.
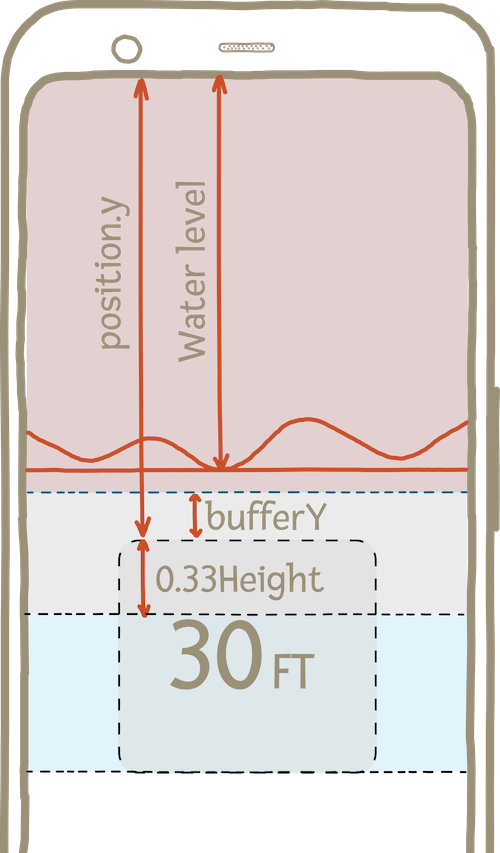
Another question we have to consider is this - how to calculate the timing of the water flow? The animations of the waterfall and of the wave increase occurs when the water level is in the blue zone. Thus, we need to calculate the time at which the water level passes 2/3 of the element's height.
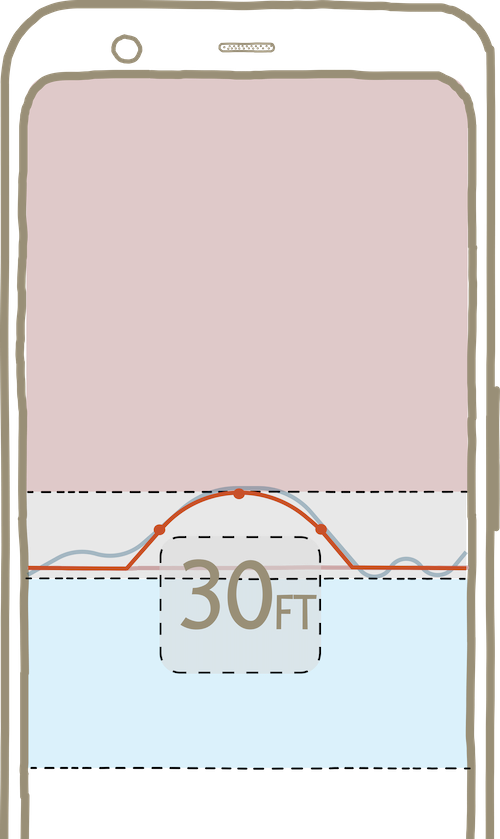
Let's take a closer look at the flow around the element. The shape of the water flow is based on a parabola - we chose a simple shape for the sake of the tutorial. We use the points shown in the picture through which the parabola passes. We do not extend the parabola below the current water level (the horizontal dim red line).
Let's look at the waterfall animation: we will use the same parabola, changing its height from the initial position, and the OvershootInterpolator for a softer fall effect.
In this case, we use the height multiplier animation so that eventually the height of the parabola becomes 0.
In addition, we need to change the size of the waves in places that overlap the UI element, because at the moment of the water falling motion they increase, and then decrease to their normal size.
The wave’s height is increased in a radius around the UI element for more realism.
Now it’s time for combining everything we have, and add color blending.
Combining all the elements
There are several ways you can paint on the canvas using a blend mode.
The first method that came to mind is to use a bitmap to draw paths, and to draw the text using Blend modes on a bitmapCanvas. This approach uses an old implementation of the canvas from Android view, so we decided to go natively instead - applying BlendMode for color blending. First, we draw waves on the canvas.
During the implementation we use drawIntoCanvas so that we can use paint.pathEffect CornerPathEffect to smooth out the waves.
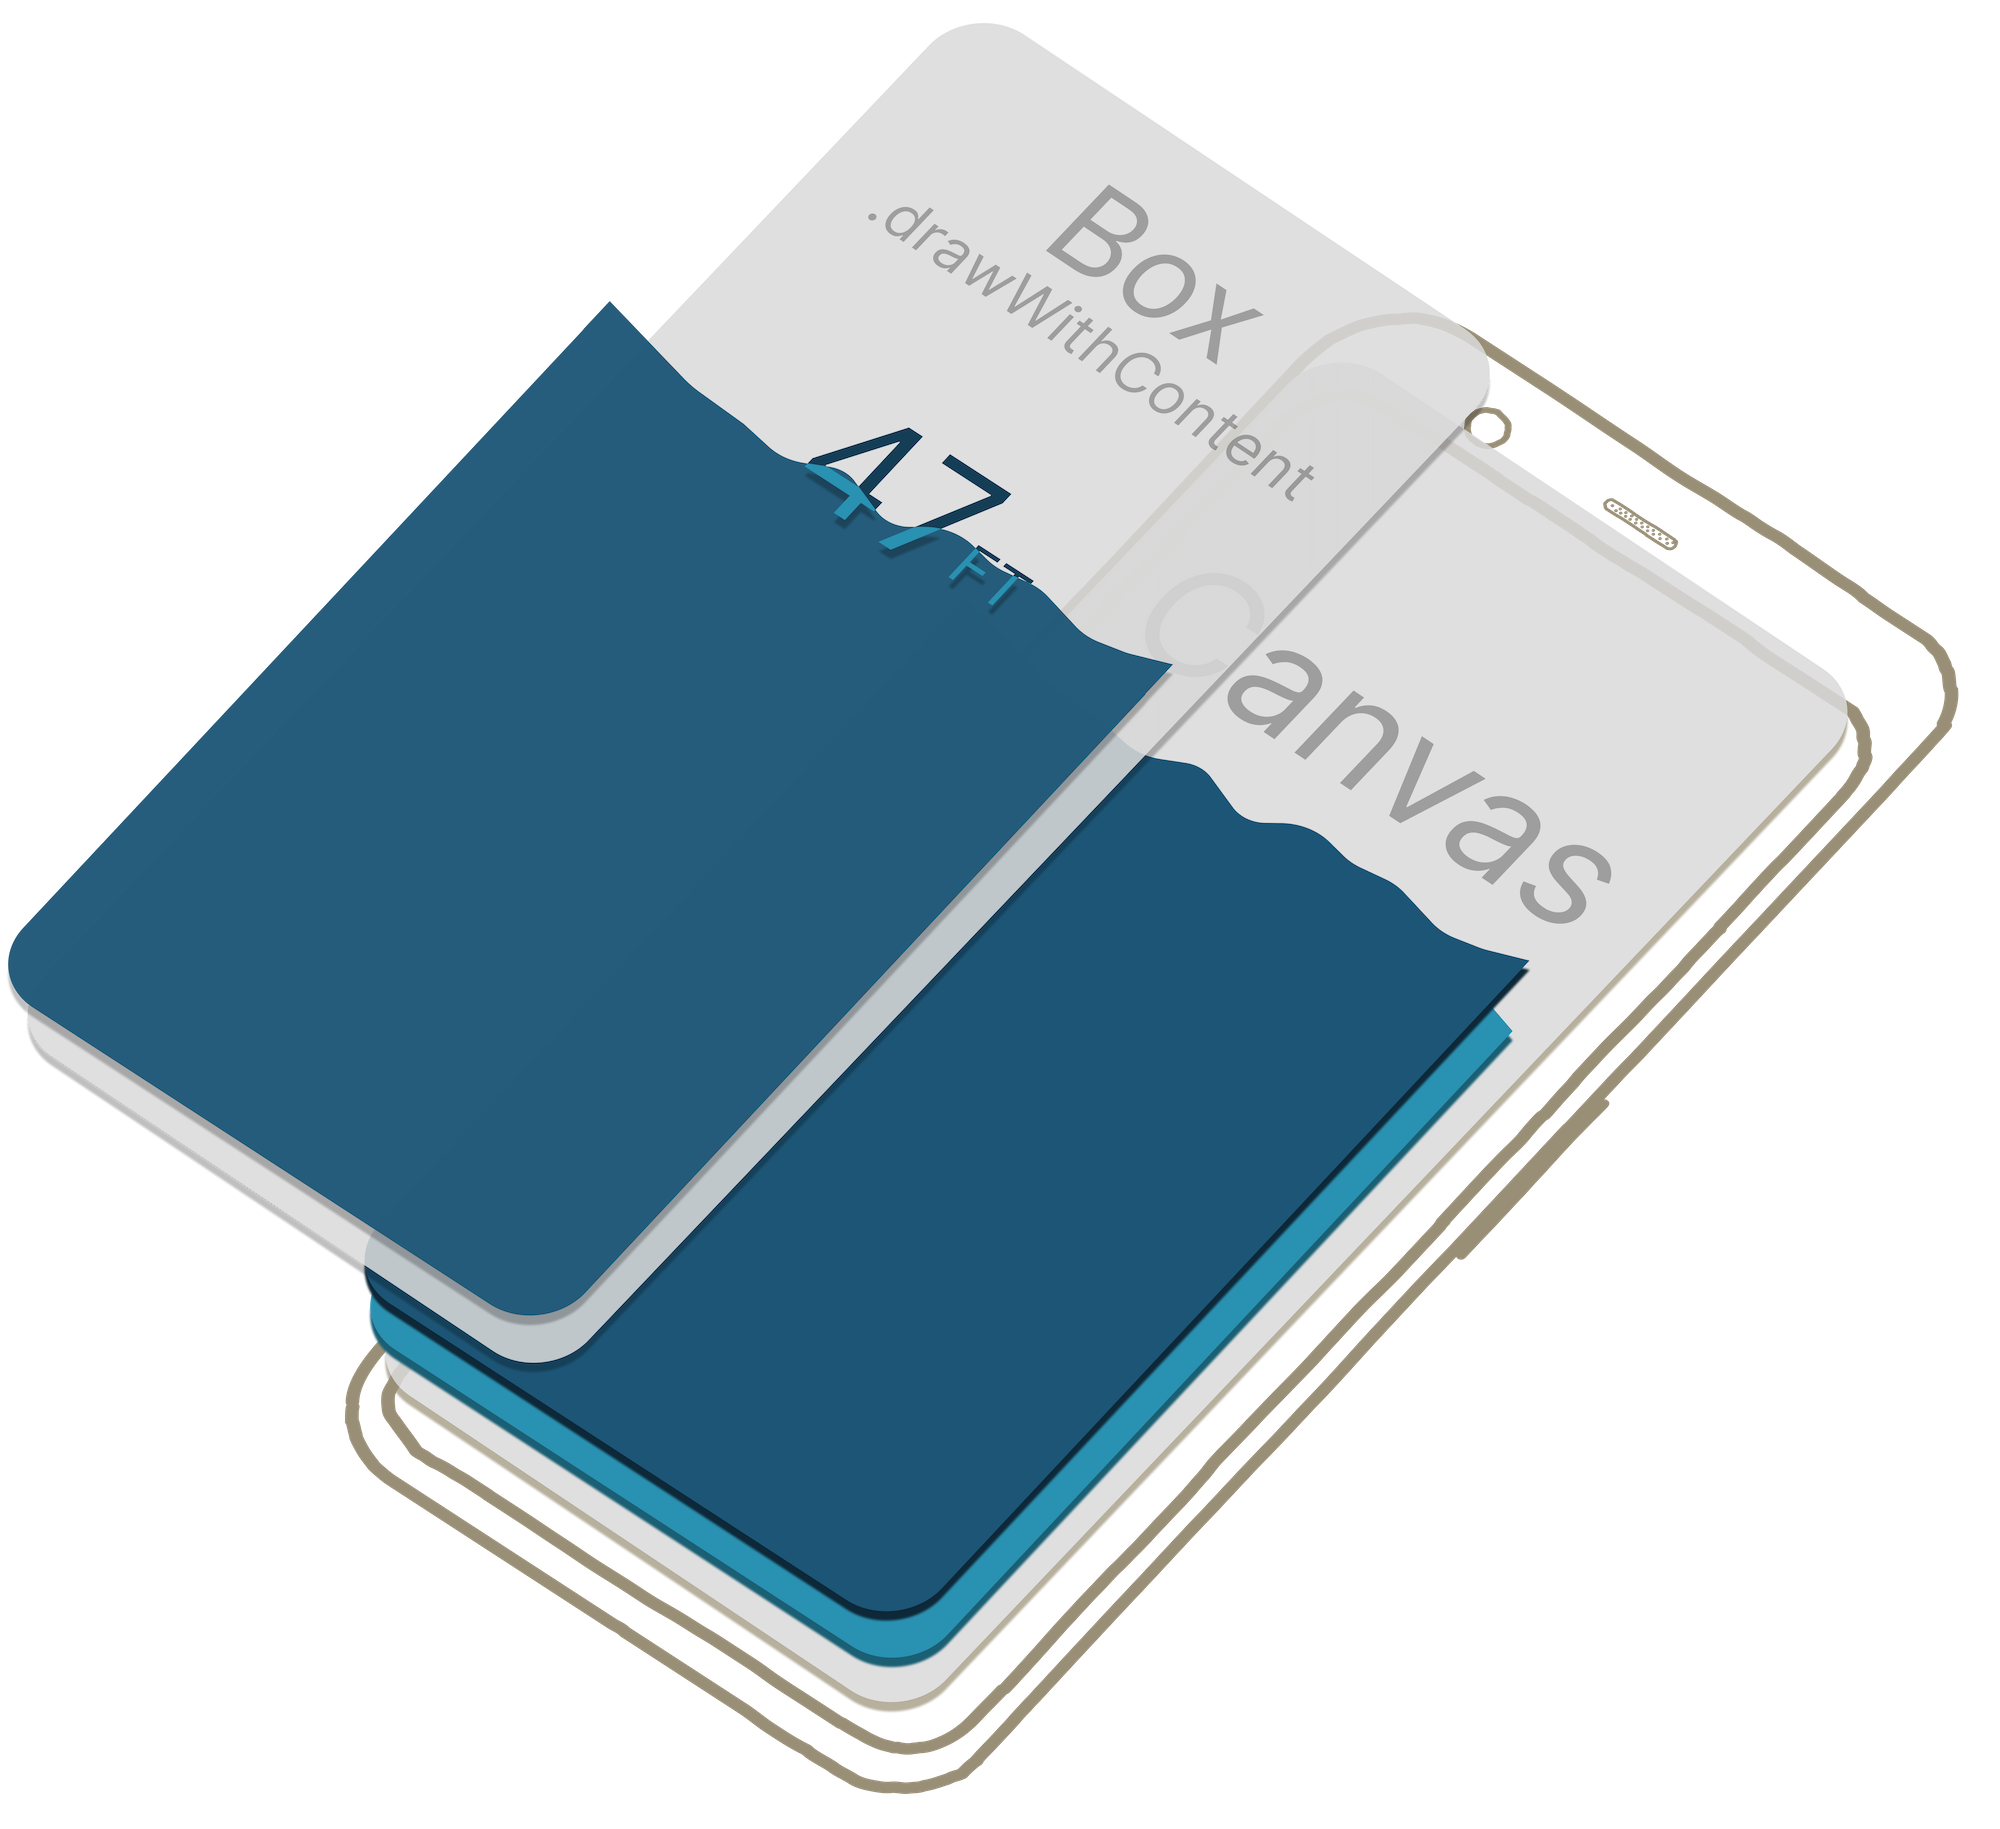
To see how much space the text takes up, we put the Text element into a Box. Since Text does not support blendMode in the layout, we need to draw text on the Canvas using blendMode, so we use the drawWithContent modifier to only draw the text on the Canvas, but not the text element.
To make blend mode work, a new layer needs to be created. To achieve this, we can use .graphicsLayer(compositingStrategy = CompositingStrategy.Offscreen). The rendering of the content will always be rendered into an offscreen buffer first and then drawn to the destination, regardless of any other parameters configured on the graphics layer.
- (This is an update to our previous implementation that used a
.graphicsLayer(alpha = 0.99f)hack. @romainguy helped us with a cleaner choice in the comments).
First we draw the text, then we draw a wave, which is used as a mask. Here’s the official documentation regarding different blend modes available to developers.
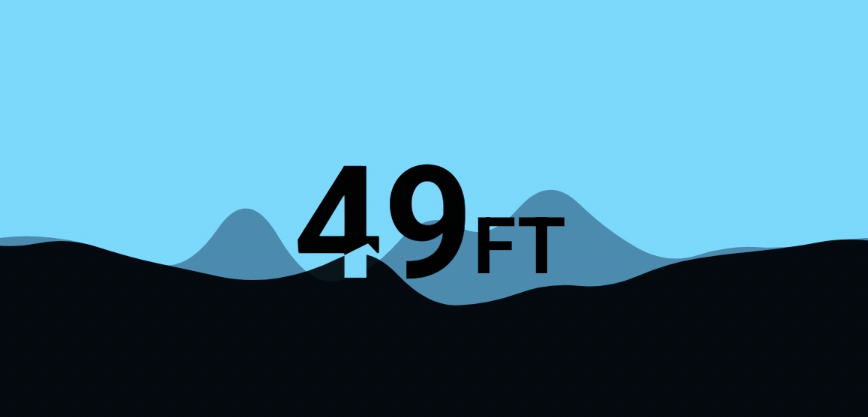
Now you can see the whole result:
Conclusion
This turned out to be quite a complex implementation, but that’s expected given the source material. We were glad that a lot could be done using the native Compose tooling. You can also tweak the parameters to get a more compelling water effect, but we decided to stop at this proof of concept. As usual, the repo contains the full implementation. If you like this tutorial, you can check how to implement the audio dribble app here or find more interesting stuff in our blog.