While working on one of our SwiftUI projects, we noticed a lack of a popular UI component – a table with its header shrinking to a smaller height once you start scrolling. So we decided to implement it, and use the occasion to create a short tutorial.
Idea
Let’s consider what we want to implement in more detail. A scaling header view consists of two main things: the header content and the main content. Both of them are going to be a part of a scrolling view. The header part is the one that is going to shrink, while the content part is just going to stay in place seemingly doing nothing. We could use the List’s header, but we would like it to be more universal, so we’ll base our work on a more generic component - a ScrollView.
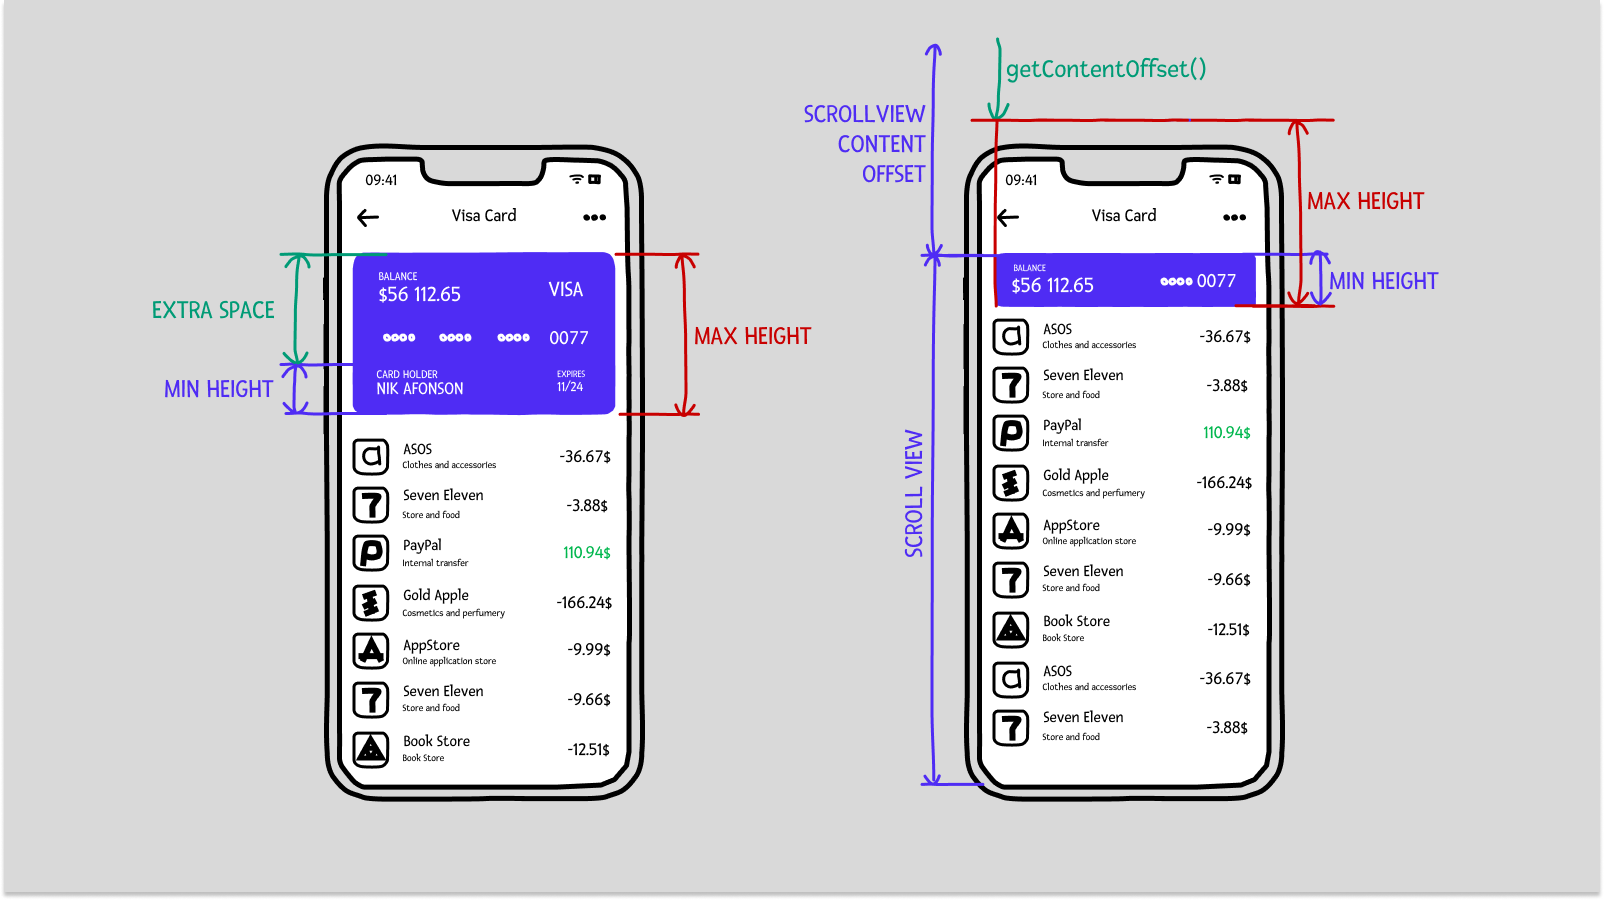
So, what problems will we have to solve if we put both our contents in a scroll view? This is the main problem - if you change the contentHeight of a ScrollView while scrolling, it will inevitably mess up the current scroll offset and it won’t look smooth at all. Here’s a small example: you scroll a little, let’s say to an offset of 100. Then we receive the offset value update and change the header’s height depending on its value. Now we’ve changed the contentSize and with it the meaning of what an offset of 100 should look like. What happens next is largely unpredictable, but it’s something we don’t want to have in our library.
Solution
The solution is quite simple - we are not going to actually change the header’s height. Instead we are going to only make it look like we are. Here’s the idea: at the start of scrolling allow it to scroll as usual, and once the visible part is of desired height, just start dynamically changing its offset inside the scroll view. In other words, it will become a partially hidden floating header, and the content view will not suffer any changes at all.
Declarations
Let’s see how we can implement this idea:
In this piece of code we can see:
- View builders for both components, passed by the user.
- The offset that was mentioned earlier, to turn it into a floating header once we reach a threshold.
Introspection
To subscribe to scroll offset updates we chose to use Introspect (a library to get the underlying UIKit component) to get access to UIScrollView. Having more control will help us:
- Receive offset updates
- Force whatever offset we want if necessary
- Setup some closures for delegate methods, which can’t be done in SwiftUI for now
- Simplify the code
Just add this modifier to our ScrollView:
and a variable to store it in:
Now, the math (maxHeight and minHeight are just constants that you tweak yourself):
We will simply return 0 until we reach the minimum header height, but after that we’ll need some math. What if we simply return currentOffset? This way the header will be stuck exactly on top of the screen. That is almost what we need, but for a little adjustment - we subtract the height of what we’d like to stay hidden.
Handling the Z coordinate
The next tricky part is a z coordinate. We’d like our content to go “below” the header when scrolling. But when putting in ScrollView like this:
the header will be “below”. So we use a trick - we put them in a different order, and make it look like it’s the other way around with offsets. We’ll see this in action after one more remark about the actual shrinking of the header.
When shrinking, we can either just “hide” the part of the header outside of the visible screen area. Or we can change the header’s height, which will probably scale or even rearrange some elements. But if we change the header’s height directly, we are also going to have to change the ScrollView content size, which as you might recall will bring unwanted consequences. So, instead we are going to use an extra GeometryReader which will always be of a stable size, and the header will change its height safely inside of it.
- The trick z coord offset from content
- A way to receive the current content frame in SwiftUI
- A
GeometryReaderwith a fixed height ofmaxHeight(see 6) - Changing the height of header safely inside a stable sized
GeometryReader - The offset for the floating header effect we discussed earlier
- A fixed height for
GeometryReader - The trick z coord offset for header
Conclusion
The solution turned out somewhat tricky, but it performs well. It suited our requirements, and after testing it out in the project we mentioned we decided to make it an open source library and to create a walkthrough to help you understand the code.
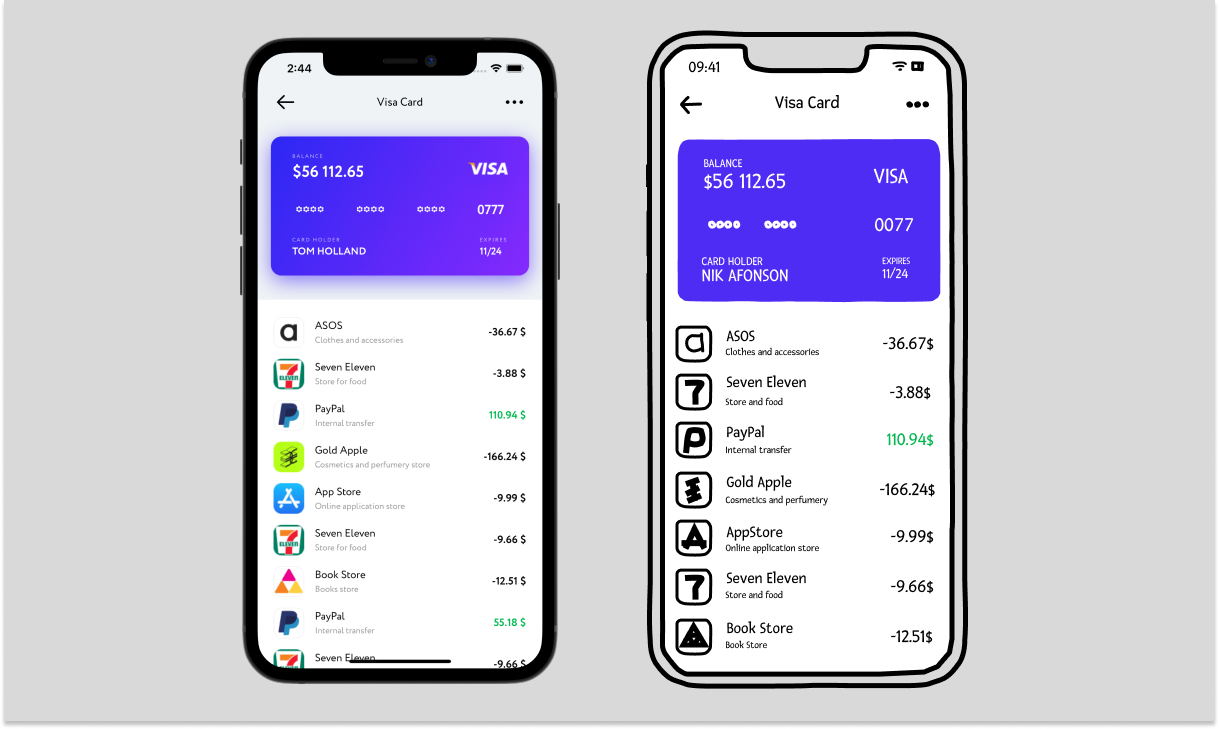
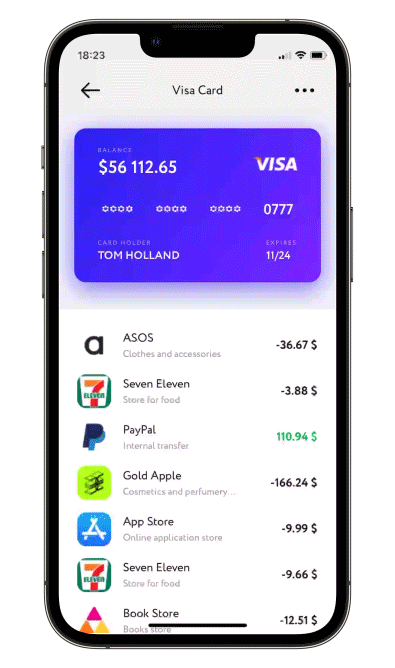
Here are some more examples of what you can use a scaling header for - a map:
 Or a profile screen:

This article is one of many SwiftUI tutorials you can find in our blog. We cover replicating complex UIKit screens and tutorials on how we implemented our open source SwiftUI libraries (such as this one).