
These days Swift developers have a lot of solutions available when it comes to code formatting and linting. You might have already heard about tools like SwiftFormat or SwiftLint, which are pretty popular in the community according to GitHub. We are extensively using SwiftLint in our vector graphics library Macaw because it gives us a lot of flexibility in terms of lint rules configuration.
In 2019, Dave Abrahams and Tony Allevato presented the swift-format tool to the Swift community. I'm actively monitoring the project’s status, and currently they have a stable release for Swift 5.1. While it is still not as powerful as other competitors, swift-format is closely tied to Swift.org, so it might become a tool of choice in the next few years.
Installation
swift-format is hosted on GitHub, and you need to build it yourself.
In order to simplify the installation process, I created a formula for Homebrew. Now you can install swift-format from Homebrew Taps.
You can find the source code of this formula in our GitHub repo.
To test if the formatter was installed successfully, you can run the following command:
Command Line Usage
By default, swift-format can run in two different modes (format and lint) and print configuration in JSON format.
If you want to format a particular Swift file you should pass the filename as a parameter to swift-format:
After that the tool will print the formatted file contents with the default configuration.
To apply your corrections to the default configuration, you should first dump its content:
Configuration example:
After that you can edit the parameters you need and pass the new configuration file path by using the --configuration parameter:
You can read more documentation about configurable settings on the project’s GitHub.
By default, format mode doesn’t overwrite the file’s content and only prints the results in the standard output. You should add the -i (in-place) parameter if you want to change the actual file contents after formatting, e.g.:
Despite the format mode, you can lint your code by passing the corresponding mode value to swift-format and printing diagnostics for desired source files.
Example output:
Xcode Usage
The main question is how to easily integrate swift-format into Xcode, given that it’s a command line utility. Since swift-format source code can be added into the project via Swift Package Manager, I tried to implement a Xcode Source Editor plugin. I ended up stuck with some build issues presumably related to plugin limitations. It’s not a big problem, because we still can add custom shell scripts to project build phases in Xcode.
Formatting
First of all, let's add a new Run Script to the Build Phases settings section. This script will format all files from project directory recursively (-r parameter):
Linting
After formatting it could be useful to run swift-format in lint mode to reveal potential warnings in the Issue Navigator and Code Editor:
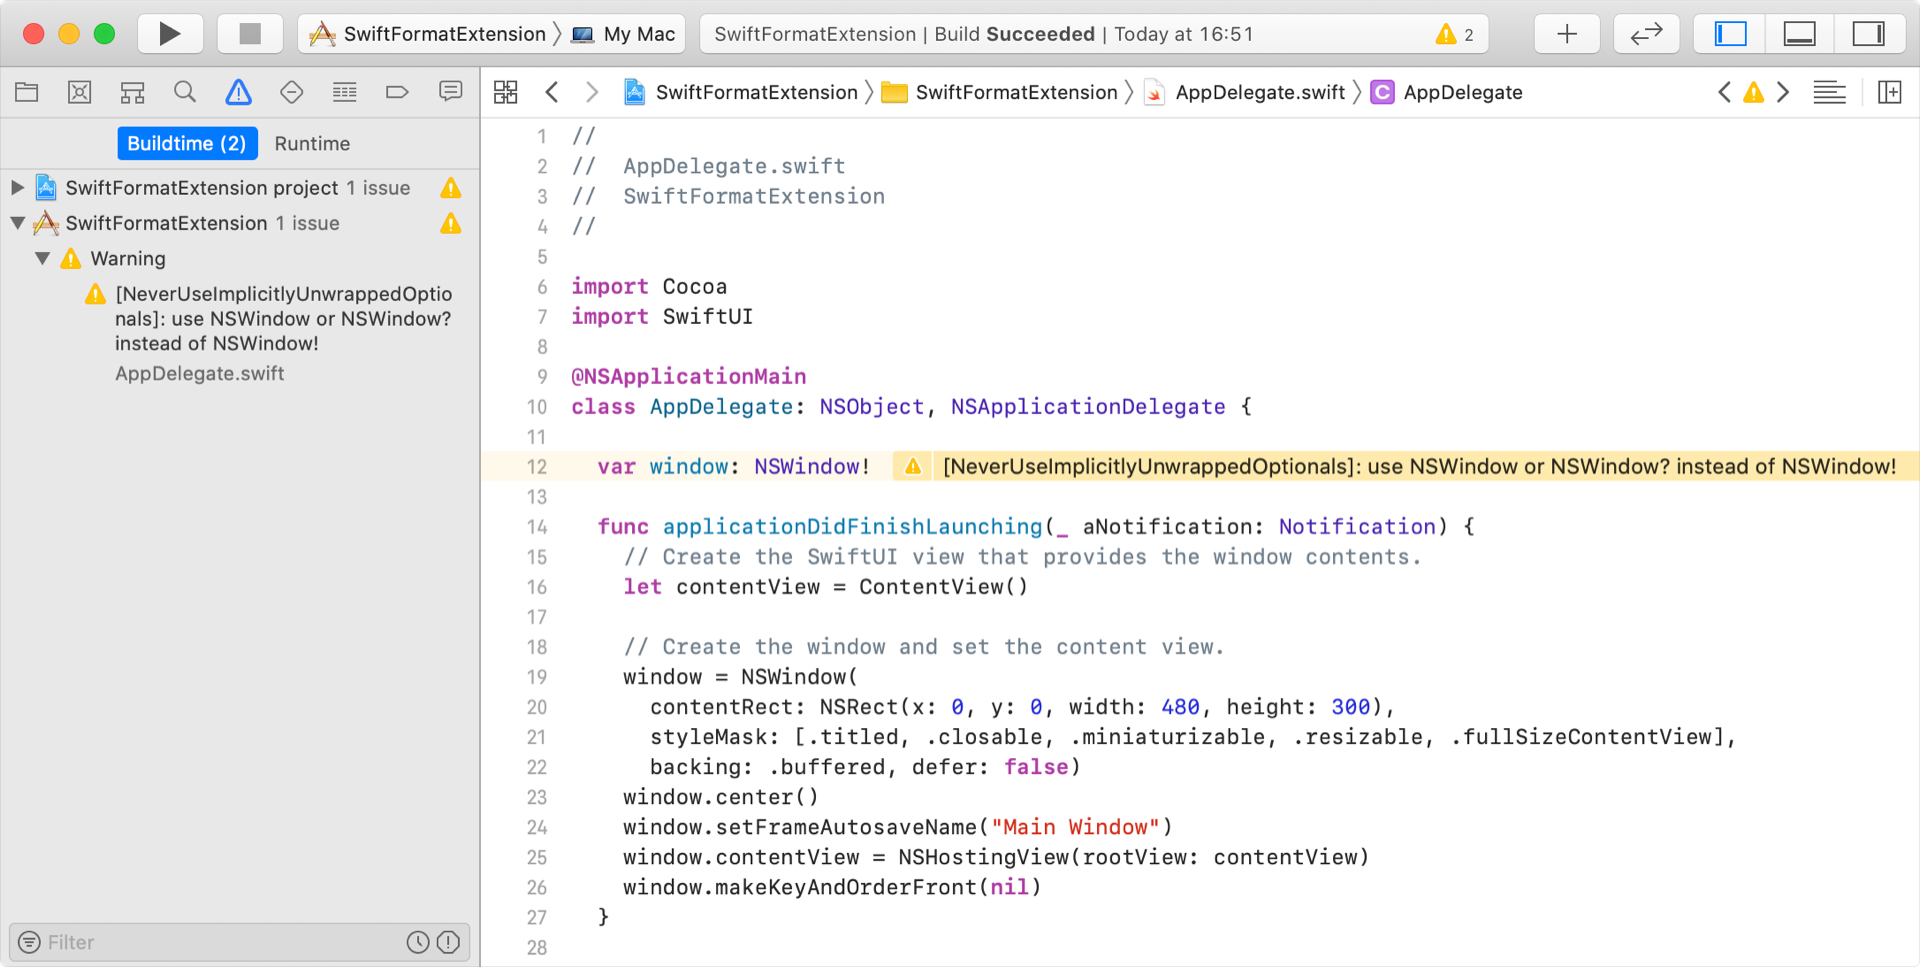
The downside is that the utility will format and lint the whole code each time the project is built. However, the performance drop will only be noticeable in very large projects thanks to the high performance of swift-format.
Git Hooks
In some cases (e.g., if you want to keep the undo history in Xcode Source Editor), it will be better to use pre-commit or post-commit hooks. With this Git hook, whenever you run git commit command, swift-format will format only changed files:
As you can see, swift-format still can be very useful even without native Xcode integration. I hope that with future Swift releases, this tool becomes more powerful and flexible.
Don’t forget to subscribe to our Twitter account and keep up to date with the latest development news and tutorials.