Overview
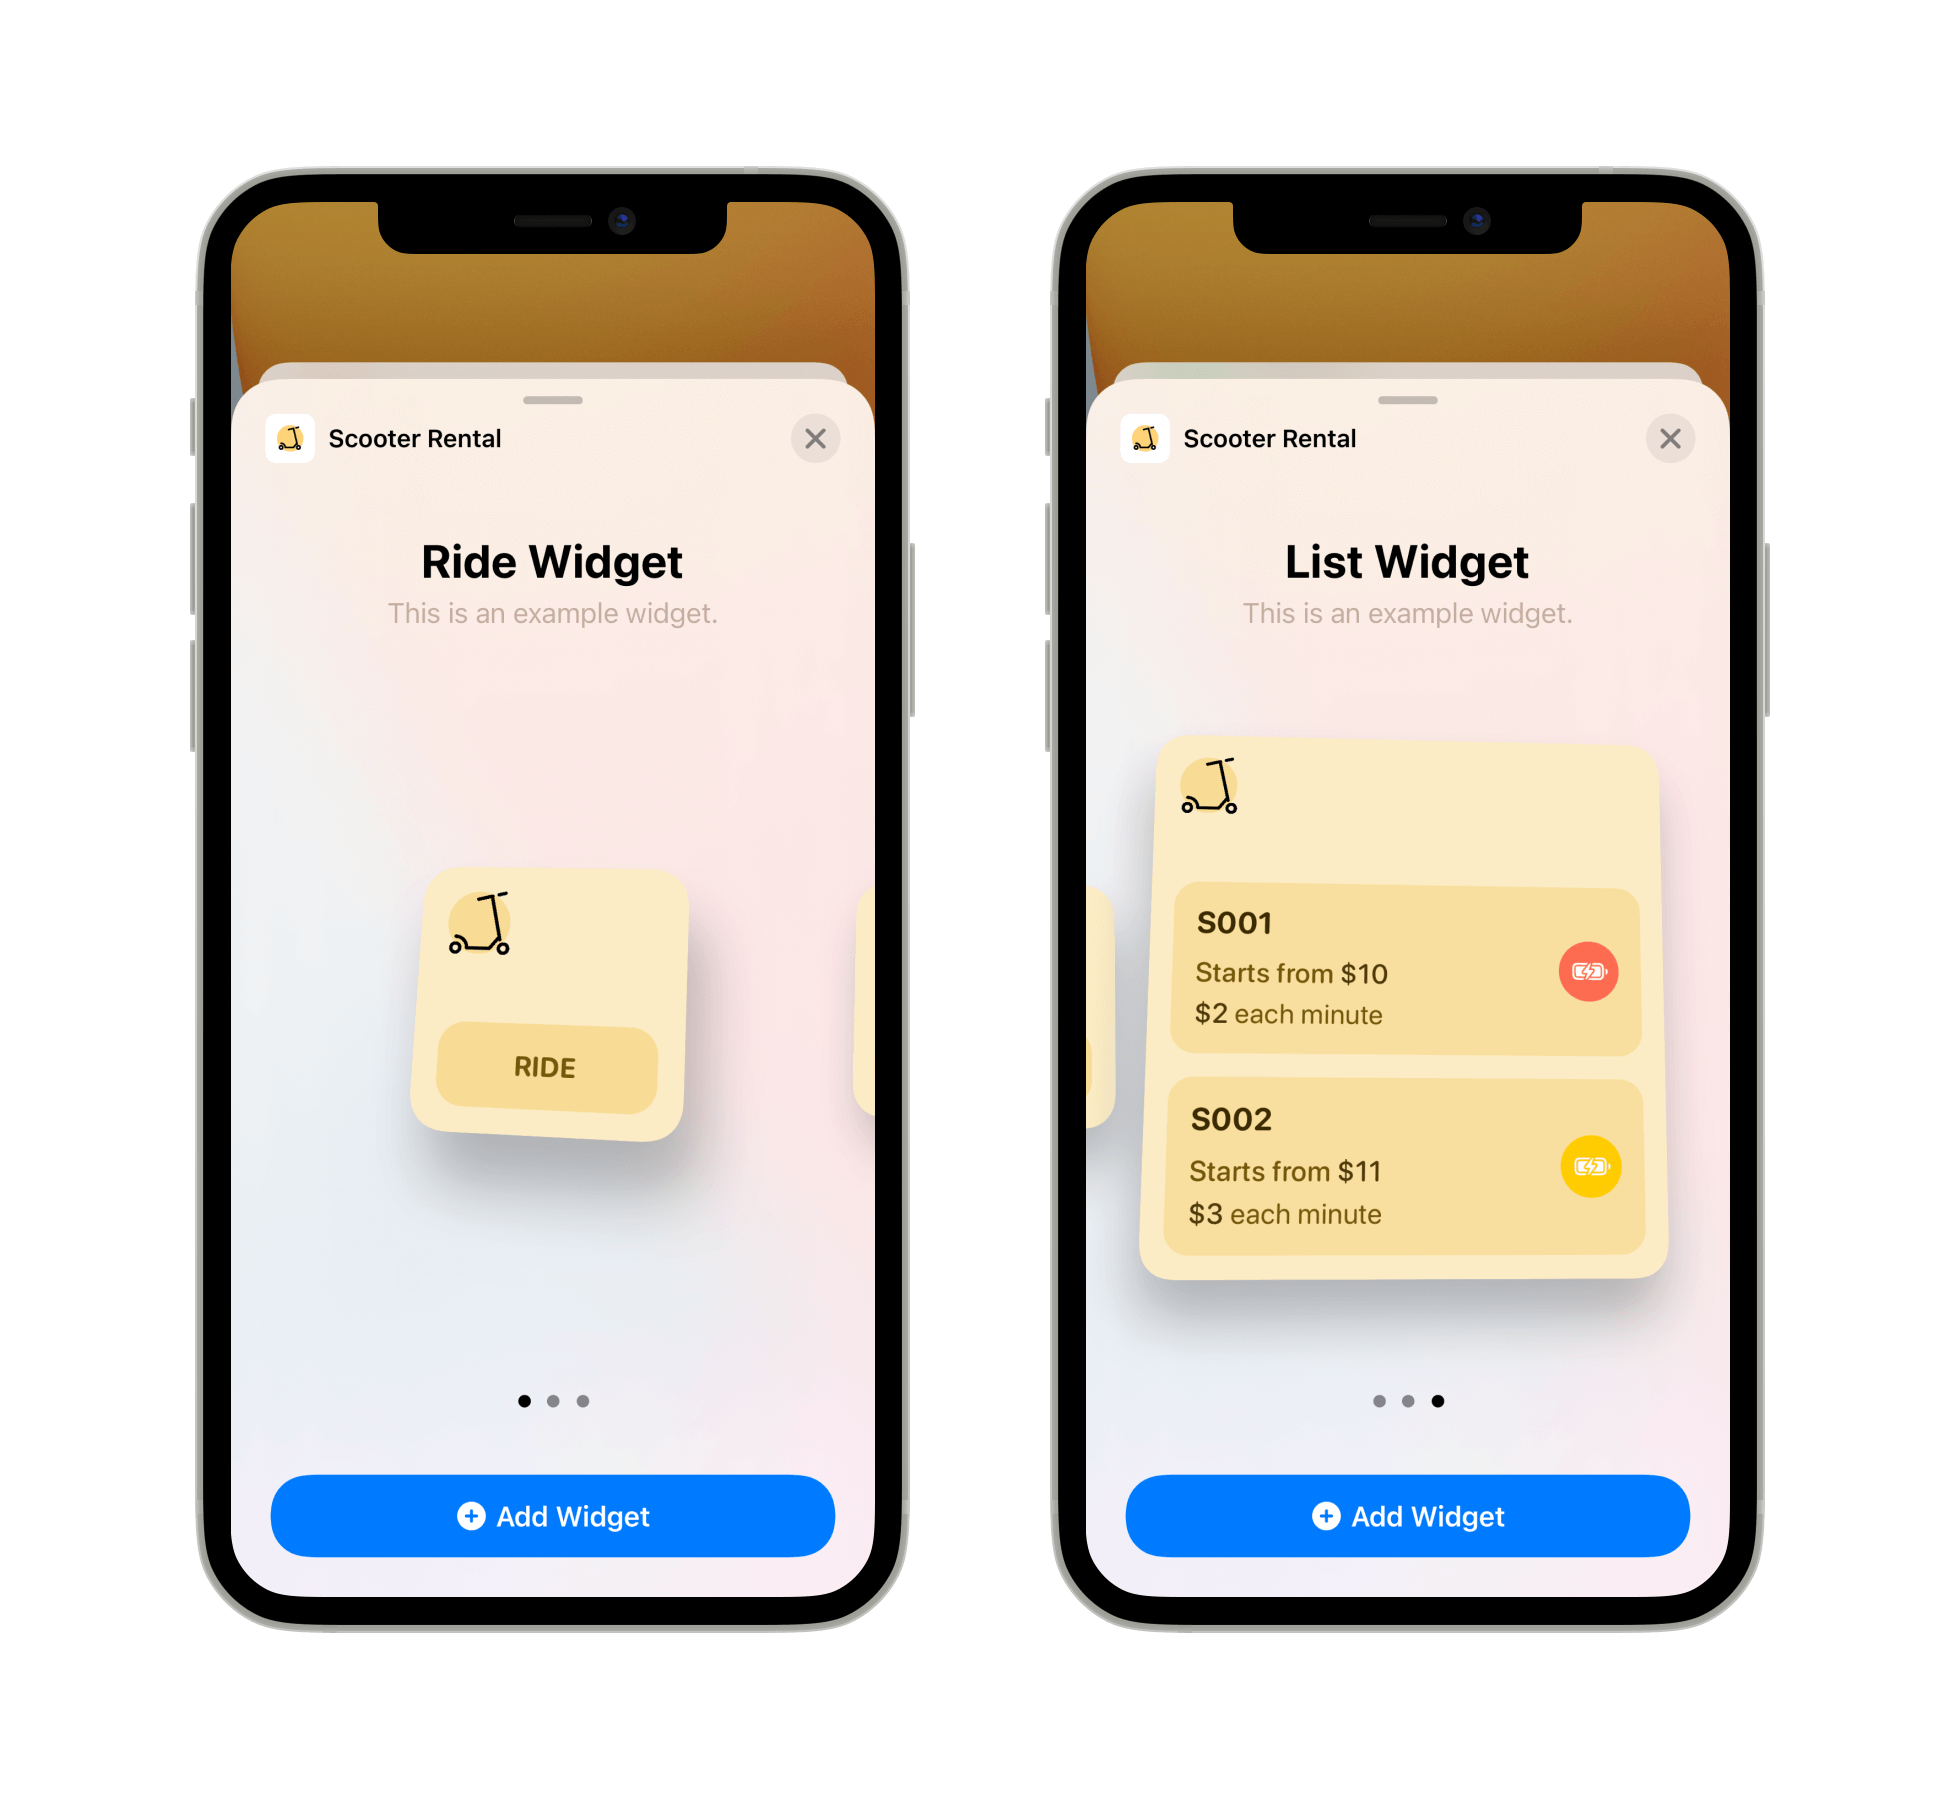
This article will revisit our scooter rental app from the previous App Clips tutorial and add widgets functionality. Here is an example of what we will achieve by the end of this tutorial.
Widget Extension Setup
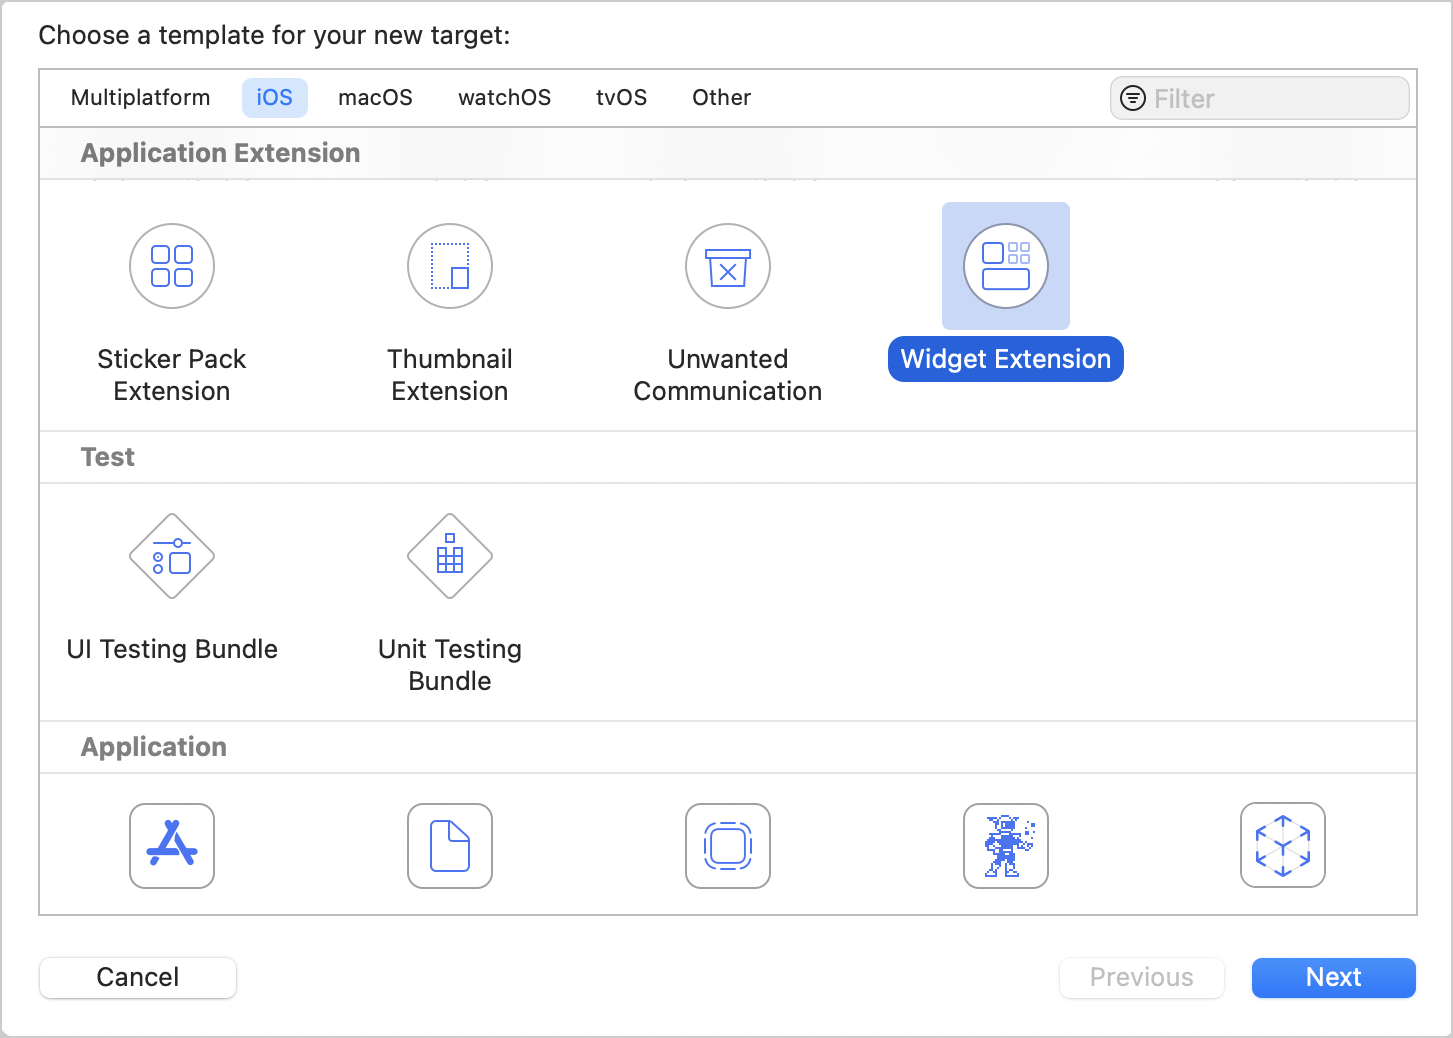
New widgets support in your app starts with Widget Extension. Add a new target to the Xcode project and make sure to check the Include Configuration Intent option.
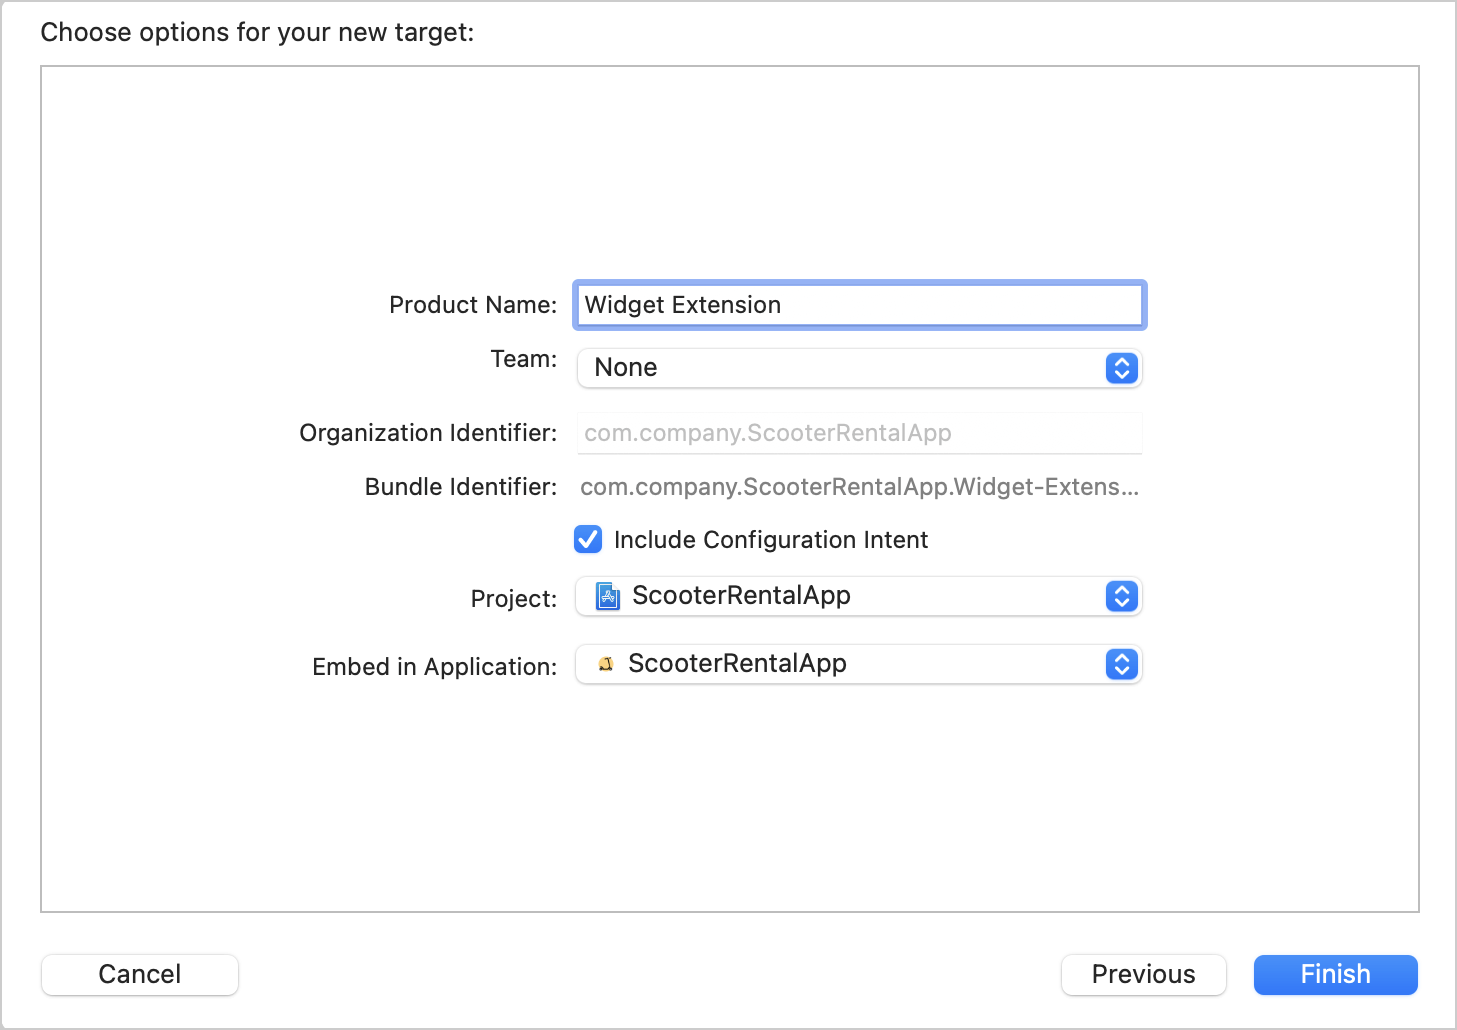
After the widget extension target is added, Xcode will generate some entities required for widget implementation, such as a timeline provider and a configuration intent.
In the code listing below, you can see a structure that conforms to the Widget protocol. It will be the main entry point for our newly created target, and this code is required to initialise and configure the widget.
The body property is required to define widget configuration. You can specify whether or not the widget has any configurable properties by using static or intent configuration. Both configurations accept timeline provider and a SwiftUI view for timeline entry presentation. Additionally, you can use modifiers to set the widget's display name, description, and supported families.
Widget Timeline
Widget’s timeline consists of entries that conform to the TimelineEntry protocol. Each timeline entry specifies its time and date and any other properties required to present your widget state. Timeline entries may also include information about their relevance.
WidgetKit provides two types of timeline providers:
- IntentTimelineProvider
- TimelineProvider
The main difference between them is that IntentTimelineProvider provides user-configured properties specified in your custom intent definition.
Now let’s discuss the implementation of each TimelineProvider protocol type.
First of all, you need to implement the getSnapshot method required for such cases as widget gallery preview or state at a certain date and time. You can determine if it’s a preview snapshot by checking isPreview property of context object. Apple recommends using sample data here instead of fetching data from the server.
Next, we need to add a placeholder method called when the system presents your widget for the first time. WidgetKit uses SwiftUI View’s redacted modifier for a schematic visual presentation of your widget.
Timeline is represented by one or more entries specified in getTimeline method. There are few ways to tell WidgetCenter to trigger your timeline update, and it depends on the selected reload policy:
- atEnd - reloads timeline after the last date in a timeline passes
- after(_ date) - reload timeline after the specified date in a timeline passes
- never - with this policy, the app should inform WidgetCenter when to update the timeline
Widget Implementation
We will add two different widgets for our scooter rental app to cover various use cases. The first widget will display the current ride status with time and fare.
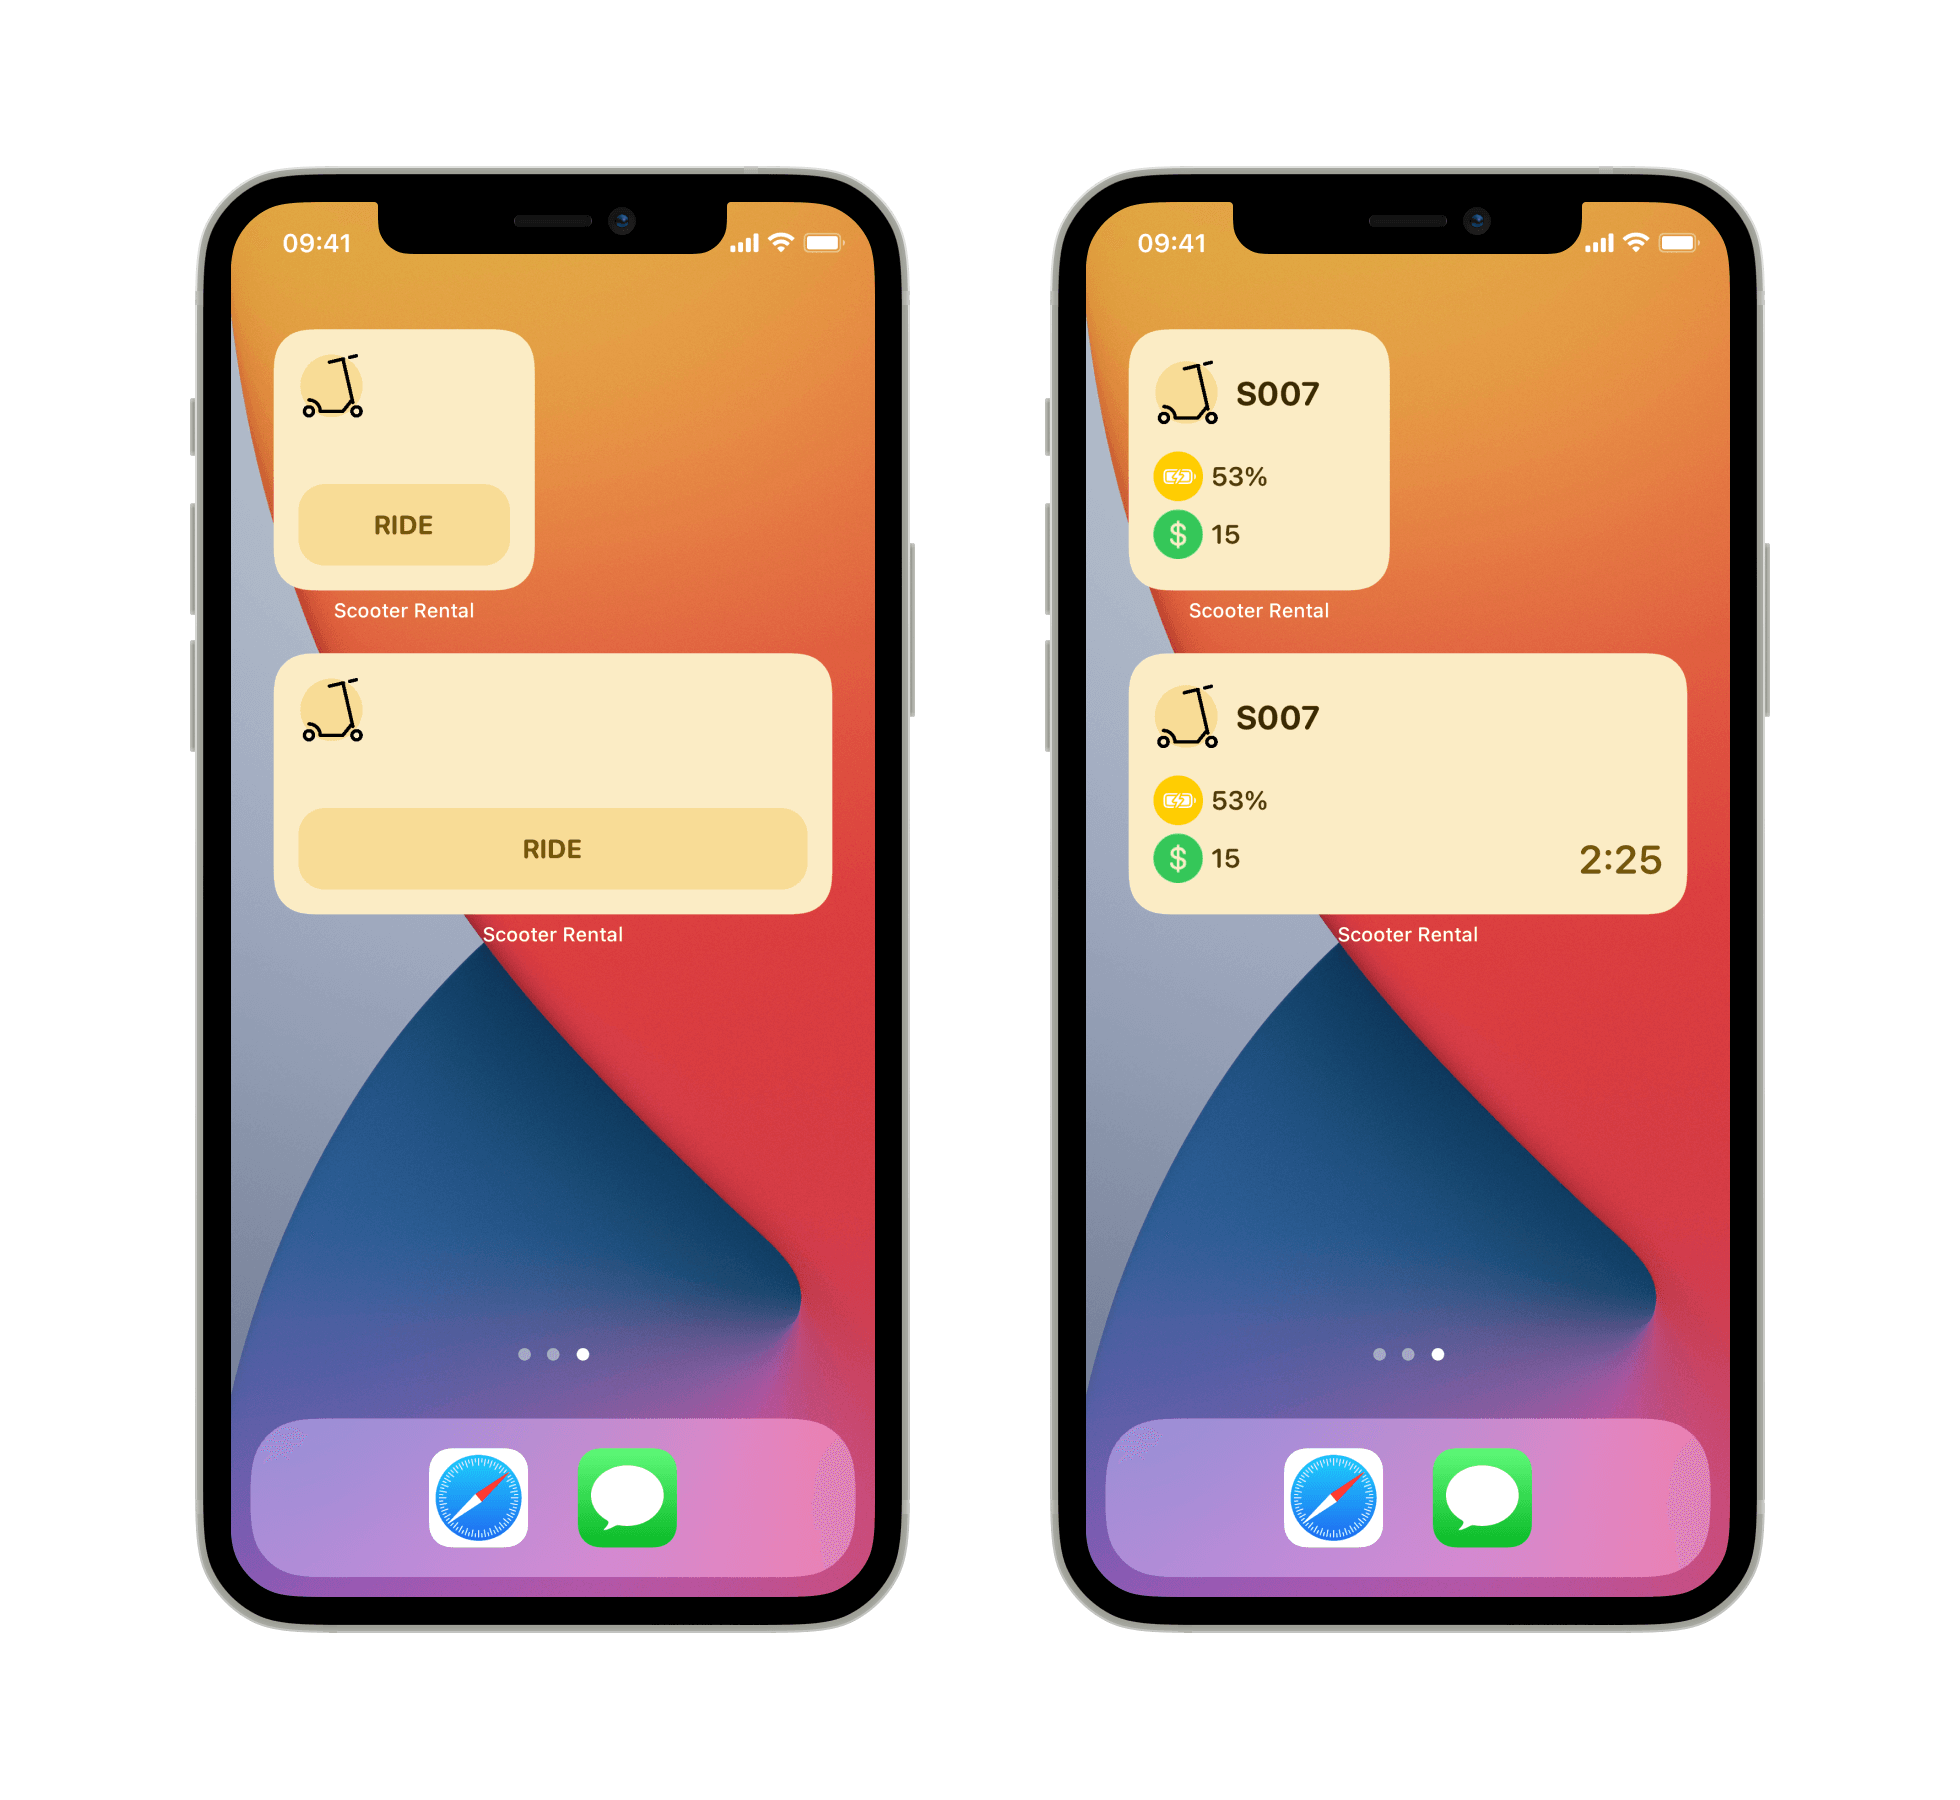
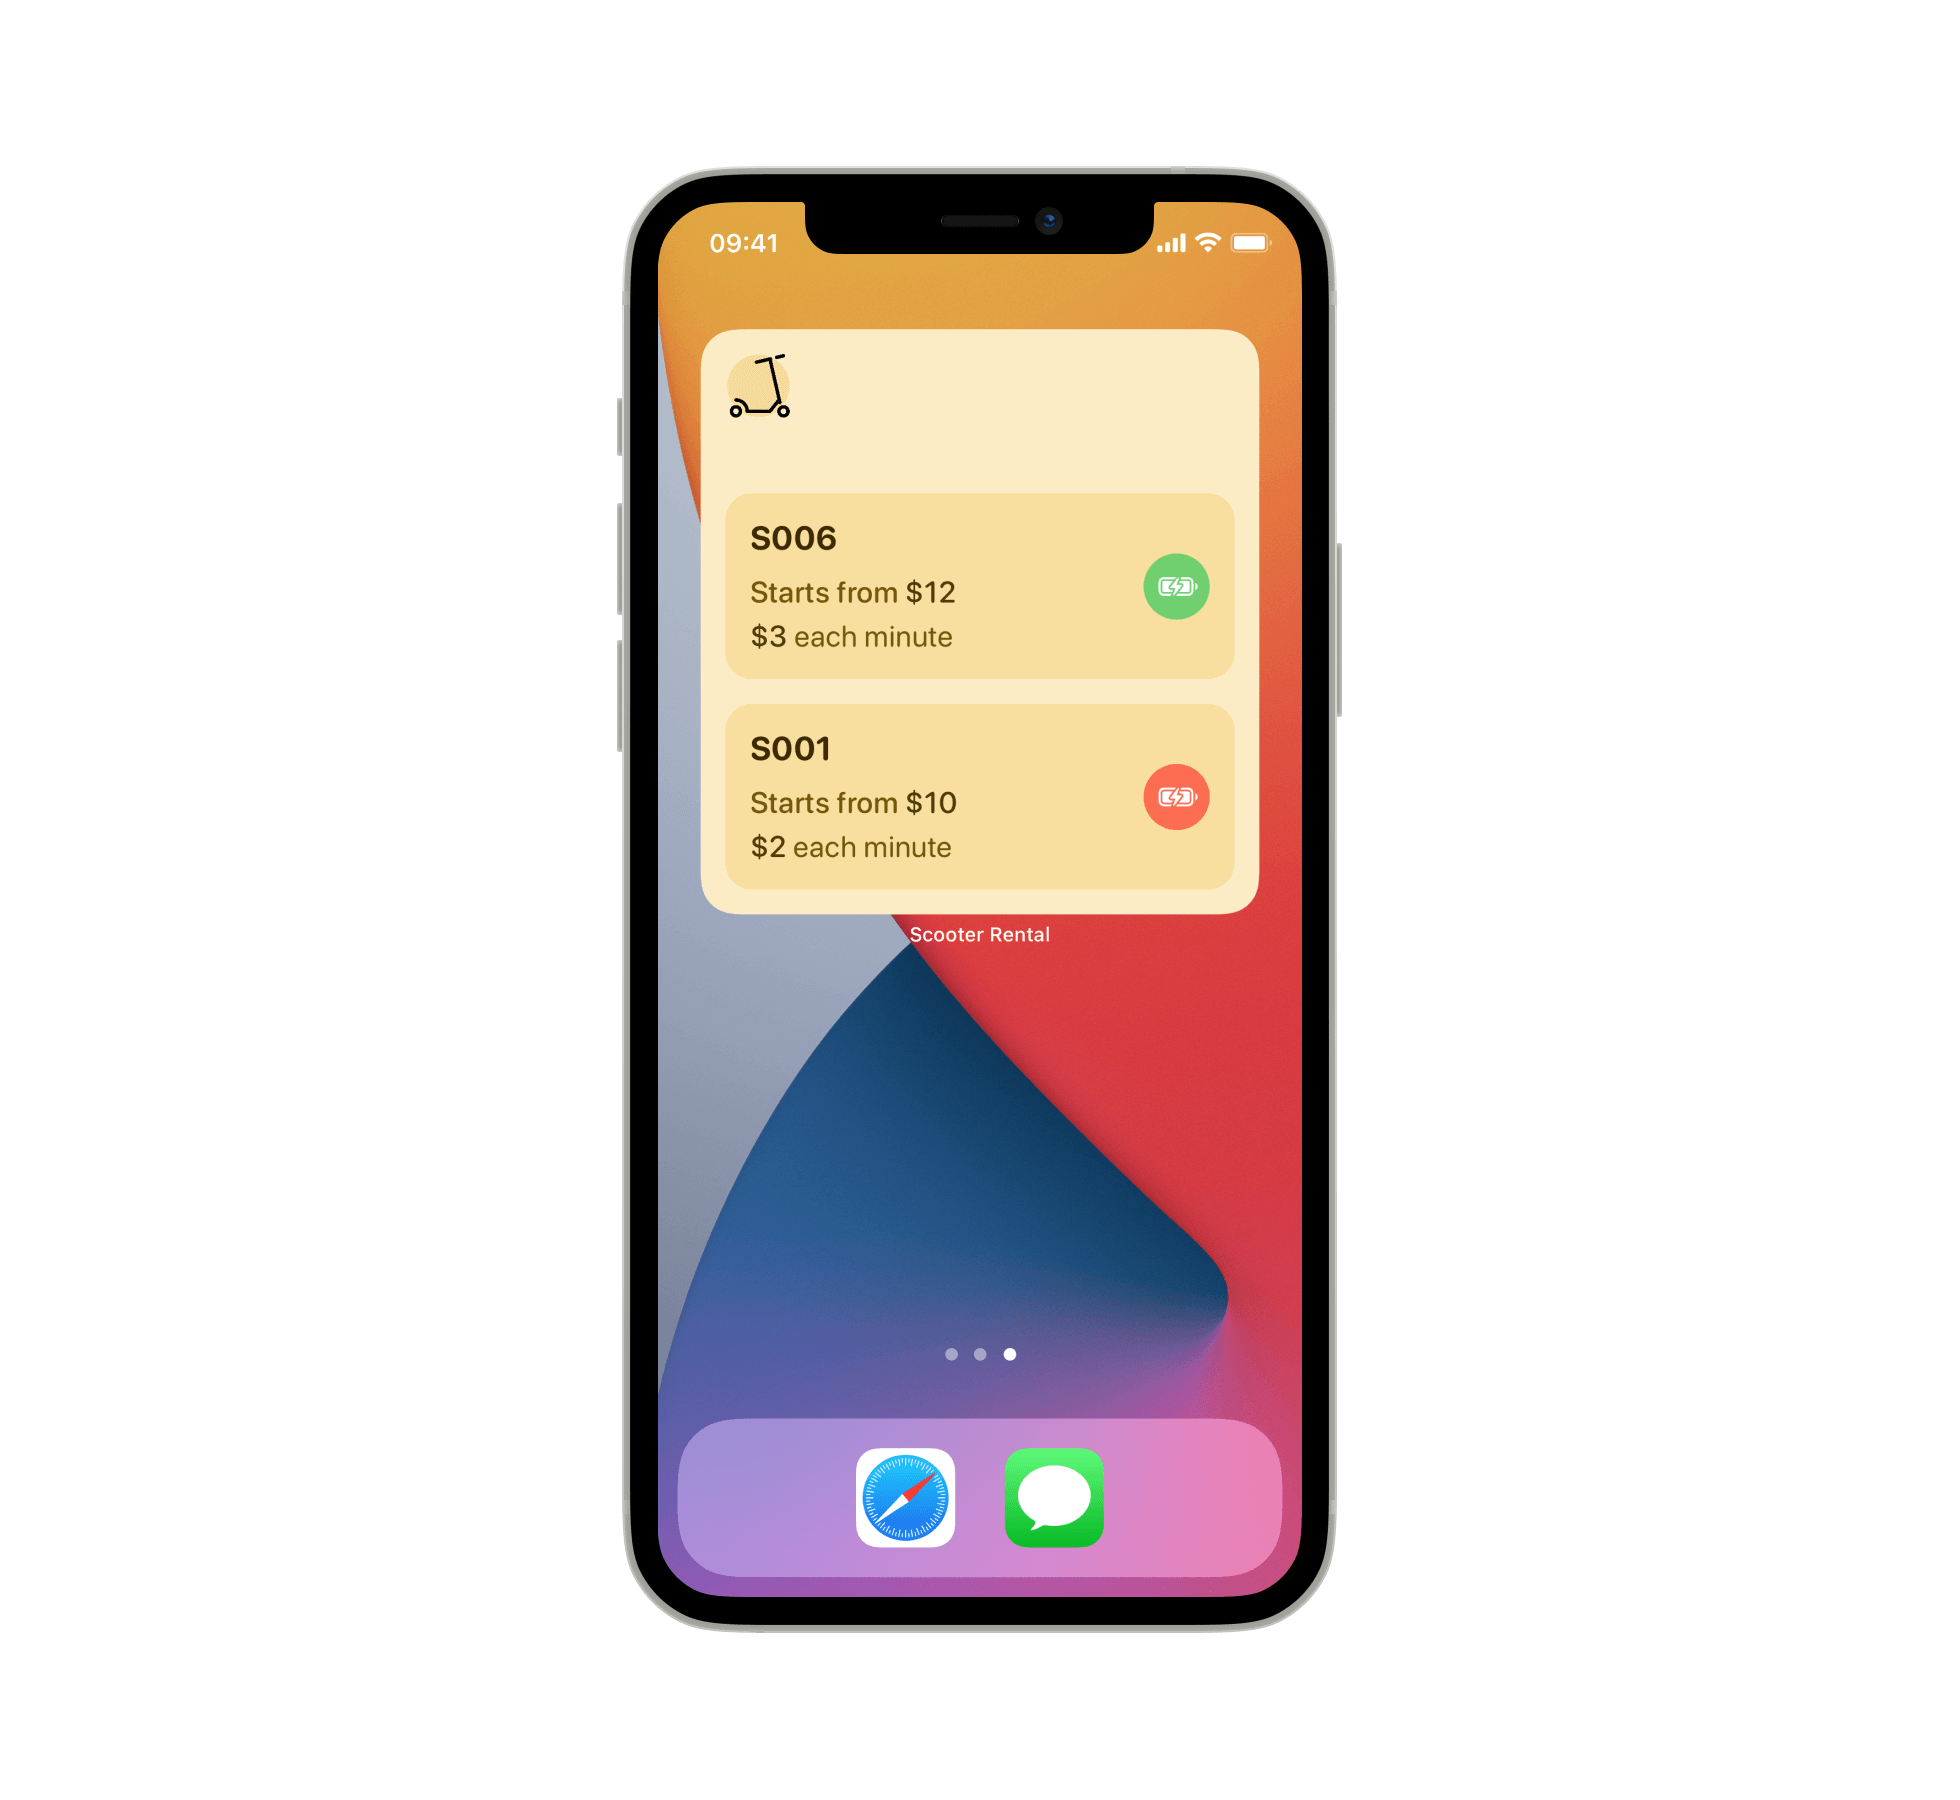
And the other one will show the list with two random scooters you can tap on to select it in the app.
Our app doesn’t rely on real hardware and a backend, so we continue using our AppModel class with predefined data from the previous article about App Clips. This data will allow us to simulate a real-world scenario when the user wants to check their scooter ride status. UserDefaults database should work fine as storage for current ride parameters.
To stick to the article's topic, we won’t add complete listings of supplementary code to this tutorial. You can always find the full Xcode project on GitHub and check the implementation.
Widget Bundle
To support multiple types of widgets, we need to create a structure that conforms to WidgetBundle protocol and specify it as the main entry point for our target.
Ride Widget Timeline
Each ride timeline entry requires additional data such as the scooter model, remaining charge, and the current ride cost.
Since our widget will update its state each minute, we need to calculate the remaining scooter charge and the current cost of a ride for each entry. If the user hasn’t started any ride yet, the completion callback receives an empty entry the same way as in the getSnapshot method.
List Widget Timeline
Timeline implementation for this widget is relatively simple. In this case, we are providing two random scooter objects. However, in a real-life scenario, the widget can use location services and provide a list of scooters near the user.
Widget Entry Views
Apple decided to use SwiftUI as a presentation framework for WidgetKit because SwiftUI unified user interface creation across Apple platforms. If you are already familiar with SwiftUI, you won't have any issues presenting the widget's state.
Ride Widget Entry View
For a ride widget view, we are going to support small and medium families. WidgetKit provides an environment that you can use to obtain widget size.
Since the widget can be in an idle or a ride state, we will check the scooter object’s existence to determine which view will be shown as a widget’s view body. You can also find a conditional check for the timer property, which shows a timer if the widget’s size is medium.
List Widget Entry View
As you discovered earlier, the list widget presents two random scooters. To make this widget more interactive, we will use SwiftUI links to open the app and show the selected scooter. But before this feature can work, you need to add additional URL handling to the main app file.
The view structure is pretty simple, despite this little touch that we made to add to the widget more interaction.
Now that writing code is finished, we can finally run the app and take a look at the Widget Gallery.
During this tutorial, we covered the basics of creating a widget using WidgetKit. I highly recommend looking at the WidgetKit page and documentation on the Apple Developers portal if you want to dive deep into this topic.
The full code is available on GitHub as usual. There you can find the whole implementation and, of course, test it on your device.
Don’t forget to subscribe to our Twitter account and keep up to date with the latest development news and tutorials.