In previous iOS versions, developers were not able to create custom haptic feedback, and UINotificationFeedbackGenerator was the only way to use haptics in your app. But with iOS 13 release this changed, and Apple finally added a new framework called Core Haptics, which allows developers to define and play custom haptic feedback patterns.
What is Haptic Feedback?
Haptic feedback is the use of advanced vibration patterns to carry information to the user. There are a lot of benefits to using haptic feedback in your app. It will provide better UX, and users can interact with UI elements with a feedback similar to physical objects.
In this article, we will take a look at the configuration and usage of Core Haptics framework, as well as ways to describe patterns required for haptics playback.
Core Haptics Overview
To start working with the Core Haptics framework, you’ll first need to create a CHHapticEngine instance. CHHapticsEngine provides a sort of connection between your app and Taptic Engine hardware.
Haptic patterns can be composed by using CHHapticPattern class and nested CHHapticEvent objects. As an event type, CHHapticEvent allows you to use haptic touch or audio resources.
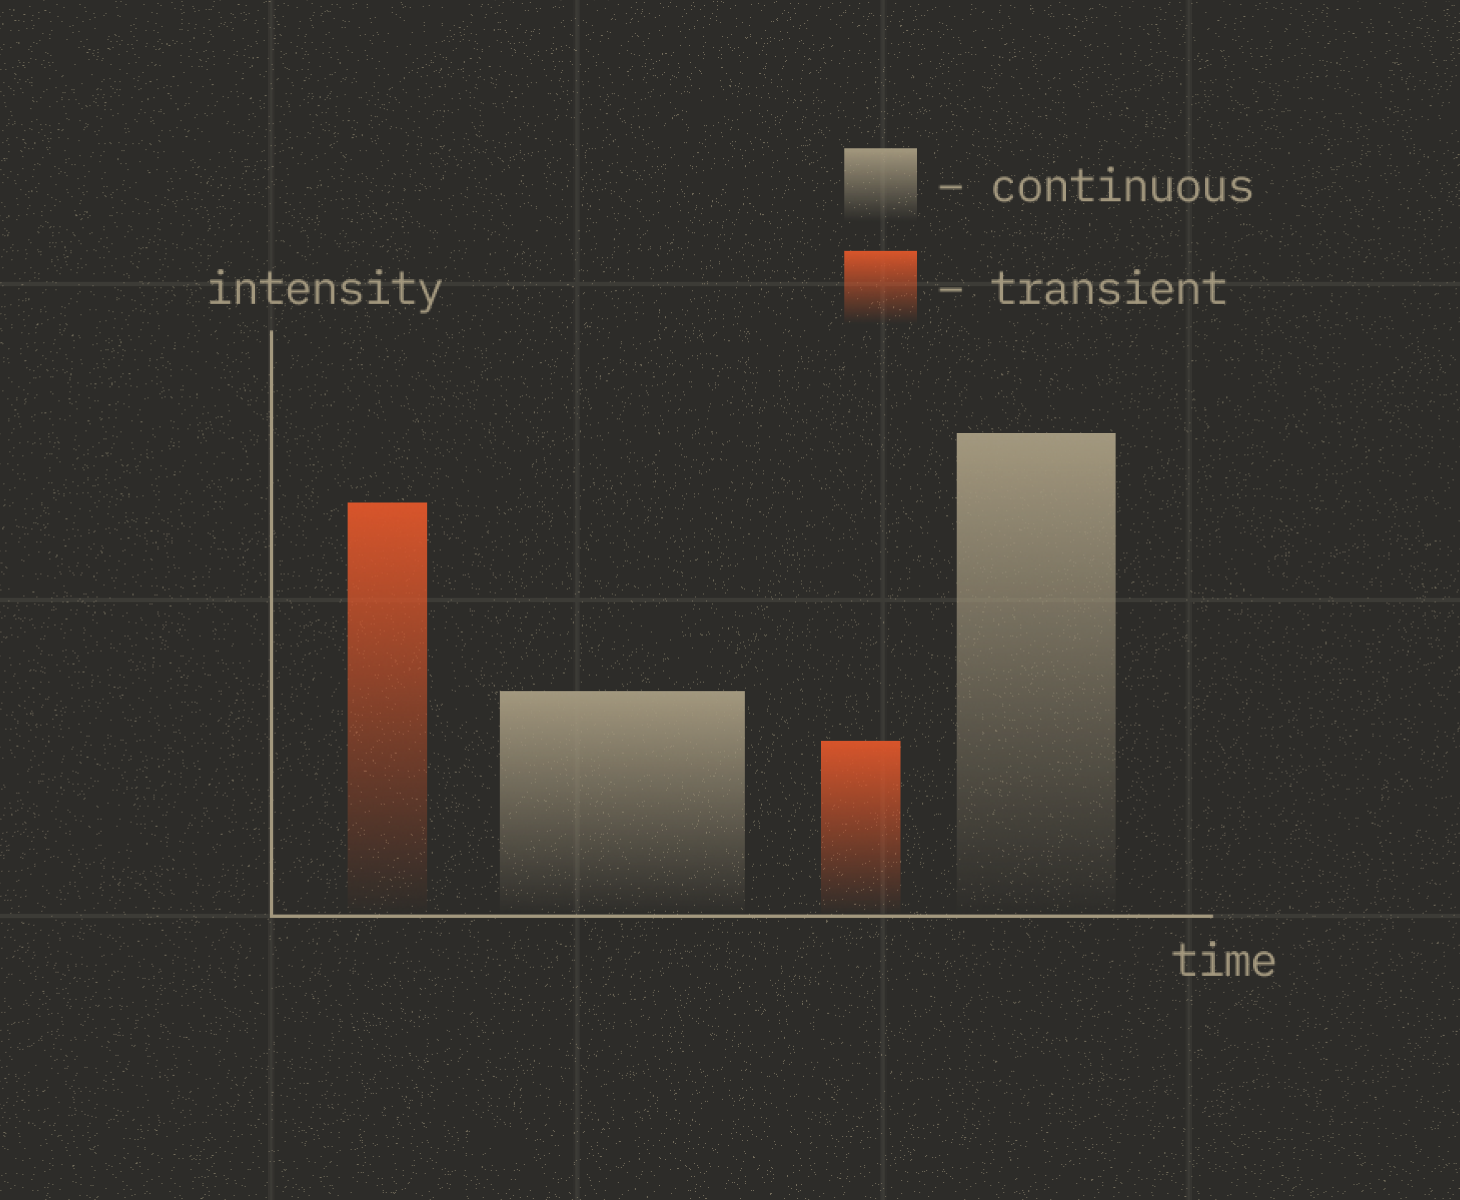
Haptic Events
Haptic Transient
Transient, as it describes itself, resembles a short impulse, and the indicated intensity determines its duration.
Haptic Continuous
Unlike transient, continuous feedback runs with the specified duration. The maximum duration of a continuous haptic event is 30 seconds.
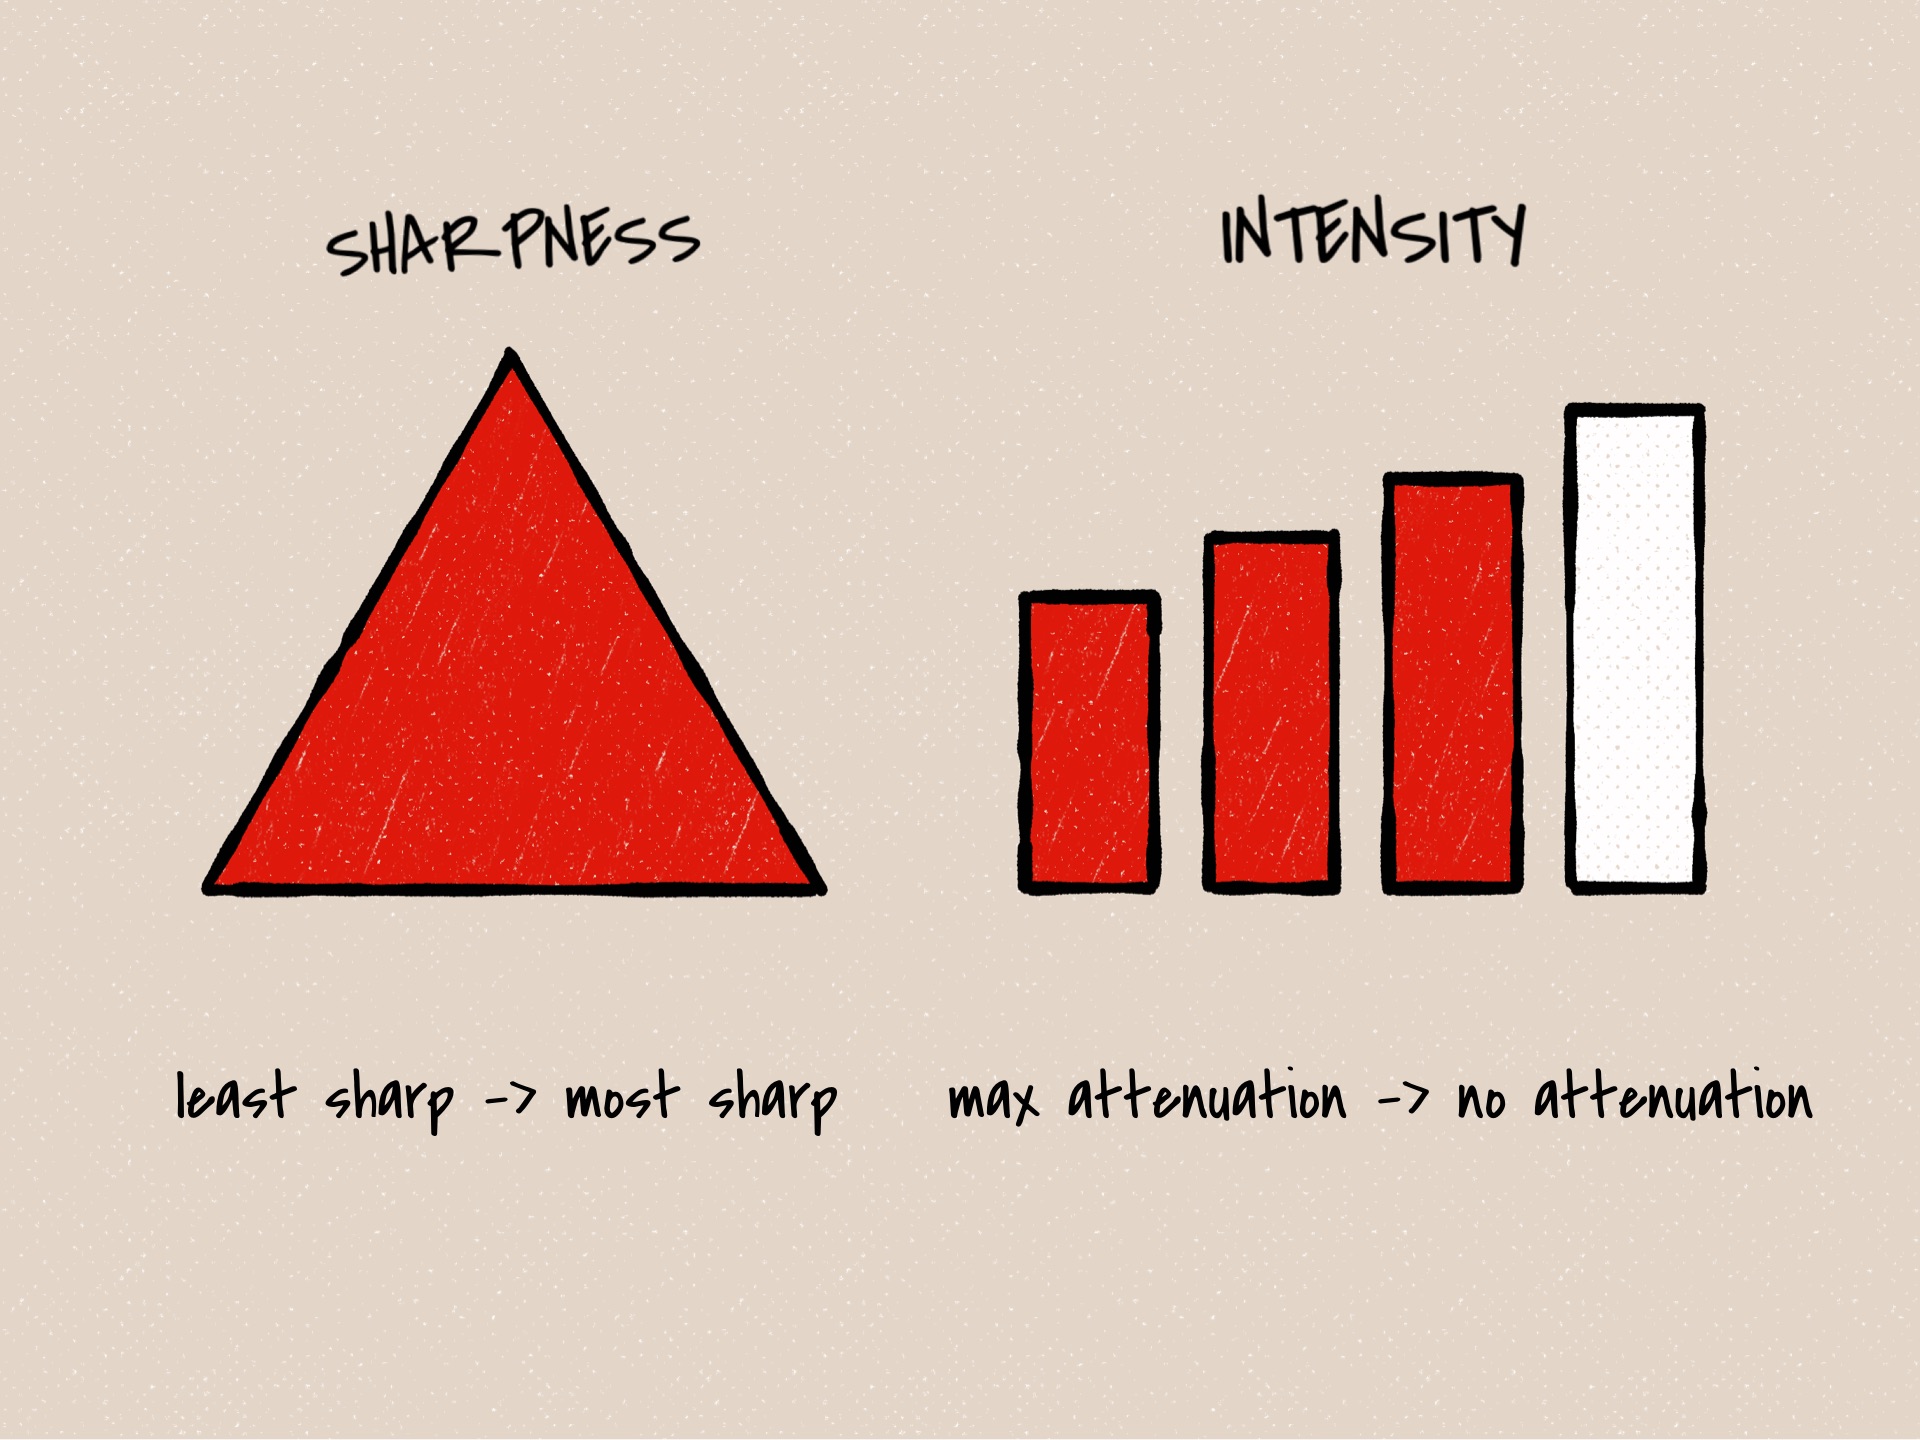
Commonly used parameters for haptic events are sharpness and intensity. Both can be a value in the 0 to 1 interval. If you want to control your events more precisely, you can additionally define attack, decay, or release time parameters.
Audio Events
Audio Continuous
This event plays audio continuously depending on the duration parameter.
Audio Custom
Haptic pattern player plays audio file only once. In this its behaviour is similar to the transient event.
In order to create a custom audio event, you need to register your file at first. CHHapticEngine provides a registerAudioResource method, which returns an identifier if the audio file was registered correctly. This identifier will be used later when you create the CHHapticEvent instance.
If you prefer to use the AHAP file format to define your patterns, you need to specify a relative path to an audio resource in the EventWaveformPath parameter.
For every audio event you can additionally specify volume, brightness, pan, and pitch.
Haptic Patterns
Basically, the haptic pattern is a set of related events. Optionally you can define dynamic parameters or parameter curves, which allows you to change feedback with time.
CHHapticPattern allows you to define patterns in three ways:
Dictionaries
Create a pattern by using a dictionary literal representing the haptic, e.g.:
Array of events (and parameters)
In this case, pattern events are represented as objects in your code. As you may have noticed, this example definition looks similar to the dictionary structure.
AHAP files
Apple Haptic and Audio Pattern file format mostly resembles a JSON file with a haptic pattern defined with key-value pairs.
Patterns events definition structure almost looks like dictionary one, but with some additions on the top level.
Example
Let’s create an example haptic pattern by using an audio file and haptic touches as an accompaniment for our tune. For simplicity purposes, I will use an array of events to generate a pattern.
First of all, we need to create a CHHapticEngine instance and register our audio file. As a sound for our pattern, I downloaded this tune from Freesound and edited it a bit to meet audio resource requirements.
I’m going to use two event templates with different intensity and sharpness. As a kick accompaniment I decided to set intensity to max and sharpness to a little more than half. And for rhythm sharpness is set to low, but intensity still remains near the maximum.
While listening to the melody, I decided to separate rhythm feedback into three sections separated by more intense events. So I created a method that generates an events combination from the desired relative time.
After that, you need to create a player for your pattern by calling the corresponding method of your CHHapticEngine instance.
Start your engine and player.
Now you can try to run the example on a real device. Don’t forget to check our GitHub repo to get the full source code, including a demo app with various haptic feedback patterns.
I hope that this tutorial helped you discover the possibilities of the Core Haptics framework for use in your current or future apps. Don’t forget to subscribe to our Twitter account and keep up to date with the latest iOS development news and tutorials!